It is important to understand image copyright when using images in knowledge. If you're searching images on the web, you should confirm their licensing status before using them in any UMN content.
Approvers will receive a TeamDynamix email with a link to the approval needed. This article is for those people who have the general technician role within TeamDynamix group and supervisor approvals.
A person who is designated as an approver in TeamDynamix (TDX) can use either of two methods in this article to approve or reject an Access Request Form (ARF).
There may be times when you need to give partial approval of access or service to a Requestor. Depending on the situation, use one of these methods to communicate partial approval:
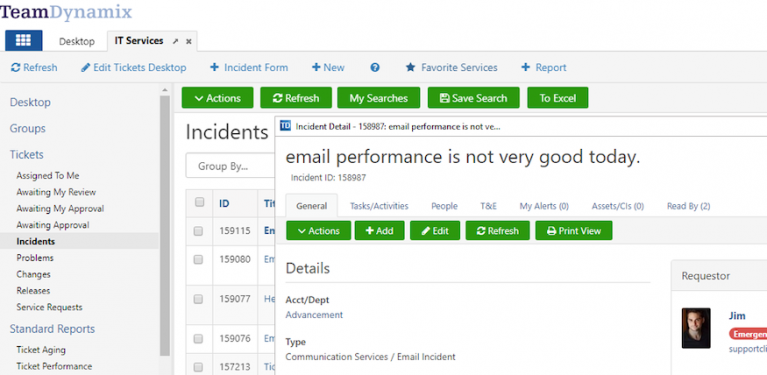
This article gives an overview of what you are looking at when you click on the title or ticket ID number of a Request ticket in the Awaiting my Approvals section of TDNext.
Use the Edit button to make revisions to the original fields in the ticket, such as associating a different knowledge base article to the ticket or revising the Impact or Urgency of a ticket.
This article shows the process to reduce the occurrence of bouncing tickets. A bouncing ticket is one that is “moved between teams excessively” or “bounced” between teams four or more times.
This article covers how to handle situations where a customer does not responds to questions about an incident ticket, making it impossible to resolve.
This article details the Incident Task Process responsibilities for Tier 2 (T2), Desktop Support, and Tier 3 (T3) staff in OIT (Office of Information Technology).
This article can be used as a template for finding High Security IT Assets that have not checked in with Jamf or MECEM (SCCM, or System Center Configuration Manager) for the past 60 days in order to get them checked in,
This article covers how to create and update an asset record. Standard Operating Procedures (SOP) for asset creation and updates are also provided. This article covers the follow topics:
When you need to use a table in a knowledge base article, follow these guidelines and formatting instructions to make the content accessible to all users.
This article covers:
Alternative text, or alt text, provides a text equivalent for images, charts, graphs, and more. This article discusses how to add Alternative Text in TeamDynamix (TDX) Knowledge Base articles.
Before archiving a Knowledge Base article, you need to check for other articles that link to it and either remove those links or update them to avoid breaking those links.
In this article:
Work In Progress (WIP) articles are generated directly from tickets, and should be created as part of the resolution process if no article for the knowledge you used to resolve the issue currently exists.
TDX allows you to edit an existing article and then save your changes as a Draft. The Draft version won't be visible to others until you Approve This Revision it.
This page provides a list of commonly-used TDX knowledge terms and their explanations. Note that this is not an exhaustive list of definitions.
In this article:
Technicians can edit an article owned by them or by their Group until it has been submitted for approval. Once submitted only those people with an editor role will be able to edit your article.
Anyone with a technician role in TDX can leave Feedback on an article and can see all the Feedback left on any article. Feedback helps us keep our Knowledge Base up to date and relevant.
Properly formed subjects greatly help with both searching and identifying which article to use.
Writing Article Titles
Follow these guidelines to better help users find your article:
Locating the names of buttons when writing knowledge allows for increased accessibility for readers, particularly those who use screen readers.
This article covers:
You can make an anchor link or in-page link (sometimes called a jump link) by associating an anchor with selected text on a page, and then linking it to another location on the same page.
While you can use a variety of editors when drafting a knowledge base article, Google Docs is the most common choice because it is readily available and easy to use.
In this article:
If there is an article published on the Technology Help website (it.umn.edu) that should not be there, it can be changed to a restricted article or to an internal article.
Restrict access to sensitive content. Publicly available information about processes or systems can be exploited to social engineer our organization, possibly leading to loss of private data or customer trust.
It is the responsibility of every OIT support professional to contribute to our knowledge ecosystem. Effective contribution requires collaboration, both within your team and with others.
You can help our users help themselves by providing them with links to knowledge articles published to the Technology Help website or wherever your department publishes its knowle
Anyone can create a new Knowledge Base article and submit it for approval by an editor.
Before someone submits an article, they should have reviewed it for technical accuracy first.
All articles, regardless of status, are visible to all Technicians, Group Knowledge Editors, and Global Knowledge Editors. The matrix below spells out the visibility for all consumers of TDX Knowledge.
Create a Major Incident when any large scale outage occurs or when an outage impacts a large number of people. Work the Major Incident until the outage is resolved or a workaround is in place.
You can set up a filter in your University email account to automatically forward all Major Incident communications from TeamDynamix to your mobile device.
The focus of working through a Major Incident is to find a permanent fix for what is broken or a viable workaround that will allow affected users to continue working.
The purpose of a Problem ticket is to manage the analysis process for either what happened during a Major Incident ticket or for analysis of recurring incidents that seem to be related.
Two actions commonly taken when working a problem ticket are assigning tasks and providing status updates for technicians. This article covers common actions you will take such as updating technicians of status,
You can email report results to other people, whether or not they have access to TDNext. You can also set up the report to run on a specific schedule and email the results to users with that schedule.
You can share a report with other Groups or individuals. Sharing a report with other groups allows technicians within the group to run the report you created.
TDX comes with some pre-built reports which you can run right away. It also has many report templates that you can copy and modify to pull results for your own purposes.
After a user has already filled out a Service Request form, they may call in to see the status of the request. This article walks through the steps to do that without making a ticket.
You can fill out a request on behalf of a user when the situation warrants. When you do, be sure to open a Service Request ticket in TDNext. Clearly document the situation and what form you filled out on their behalf.
Anytime a user contacts us with a Request (something is needed for a job; not when something is broken), complete a thorough search for a Service Request form in the Client Portal.
Service Request forms are housed in the Client Portal area of TDX. These forms are also available to users throughout the public-facing website of the group or department that they are associated with.
During the lifecycle of a ticket, there may be additional stakeholders who need updates as work progresses. Adding them as Contacts to the ticket allows a technician to notify them when updating the ticket.
When working with colleagues on tickets and ticket tasks, use the Comment feature in the Ticket Feed to communicate back and forth regarding the work that needs to be done on a ticket.
You can create a ticket template to apply when filling out a ticket. Any field values you set in the template will auto-populate those same fields in the ticket saving time.
When you can remember the name of a technician but not the Responsible Group(s) to which they belong, you can find their group(s) using the Search Filter to find tickets already assigned to that person.
Users may occasionally create multiple tickets for the same problem by accident. If two tickets are accidentally opened for the same request or incident, they can be combined.
There are several ways to search for tickets in TeamDynamix. Each ticket, no matter what ticket classification it is, receives its own ticket identification number.
The Responsible field for any ticket classification (Incident, Request, Major Incident, etc.) communicates who is responsible for the ticket. The field also communicates which Group is responsible for the ticket.
There are five ticket classification forms that technicians will use in the U of M Tickets application. Each form has fields tailored to the specific type of ticket it addresses.
All technicians in TDX have access to the People App, which you can use to find customers and their ticket history or to find groups to view technician members.
A warm transfer occurs when one technician passes a call to another technician.
The instructions below are written for ticket transfers between Tier 1 and Tier 2 in User Support Services.
As you work within TeamDynamix, you will see the language Parent and Child. This article explains what that terminology means and how it works for our processes and procedures.
Sometimes a user's name will not easily be found in the Requestor field. Use this article if you cannot find the name or internet ID of the person requesting help.
Content that should only be viewed by the University community should not be published to a publicly available website such as the Technology Help website (it.umn.edu).