
This guide describes how to add the Alderman Hall 305 Canon C6555 printer to Apple computers.
Basic Requirements
Desktop computers connected to the university's network using a physical wire or hardline connection (Ethernet) should be able to connect to the printer using these instructions.
Laptops must be connected to the University Network via ethernet cable or eduroam WiFi network. Connecting to the university's network remotely via the Cisco Secure Client VPN also works.
For steps on how to connect to the eduroam wireless network, refer to How to Connect to Eduroam.
Install Using Self Service
JAMF Pro is used for managing university-owned Apple computers. It is also used to deliver new software. If the computer is not joined to JAMF Pro, please contact the Technology Help Desk or follow the instructions to self-enroll.
All recently ordered computers should be delivered enrolled in JAMF Pro. Faculty and staff in the department should be able to install the printer by opening Self Service, which is already on their computer:
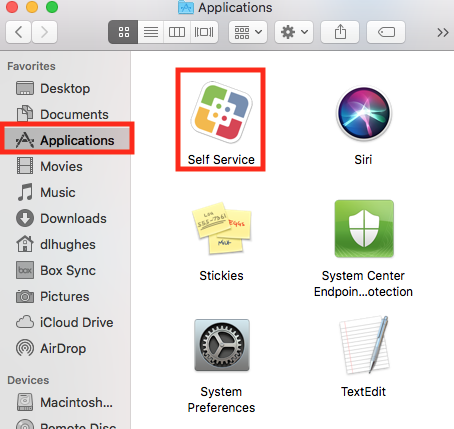
- Launch Self Service
- Open the Applications folder in Finder
- Click on the icon for Self Service
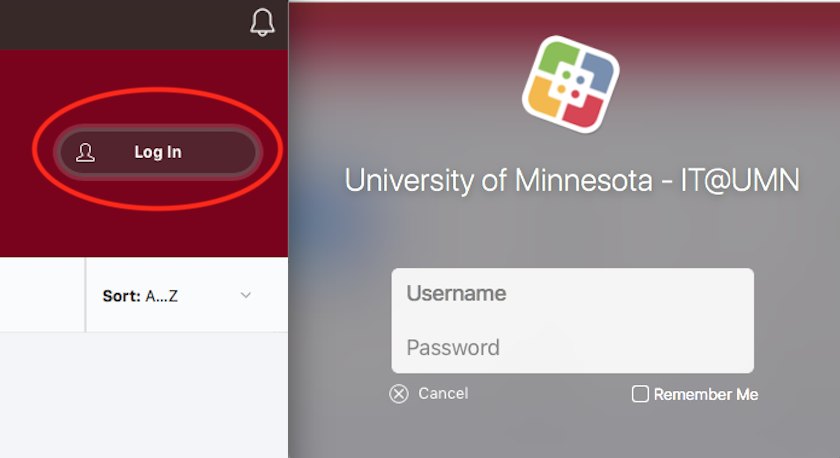
- Log into Self Service by clicking Log In from the top right. When the log in window appears use your UMN Internet ID and password
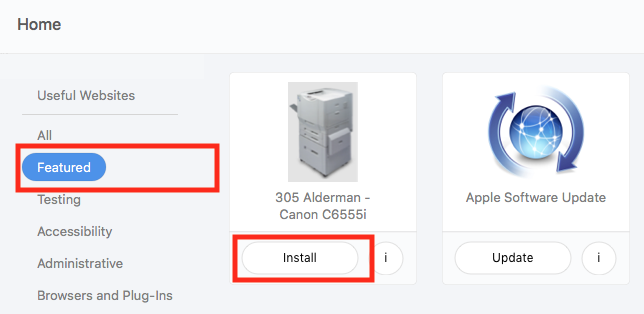
- Install the printer
- Locate the package labelled 305 Alderman - Canon C6555i
Note: It can be found in the Featured section (shown by default) - Click Install to add the printer to your workstation
Note: This package has been tested with macOS 10.10.x through 10.13.x.
- Locate the package labelled 305 Alderman - Canon C6555i
- Verify that the printer installed successfully
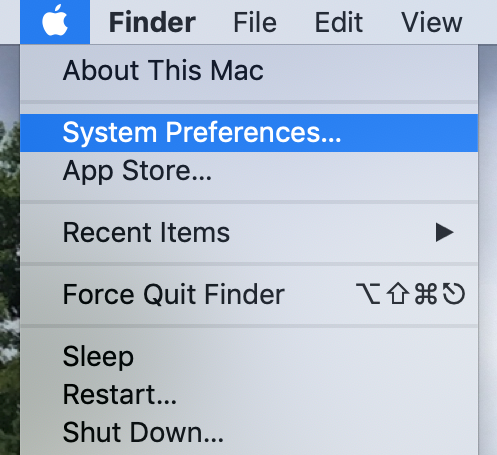
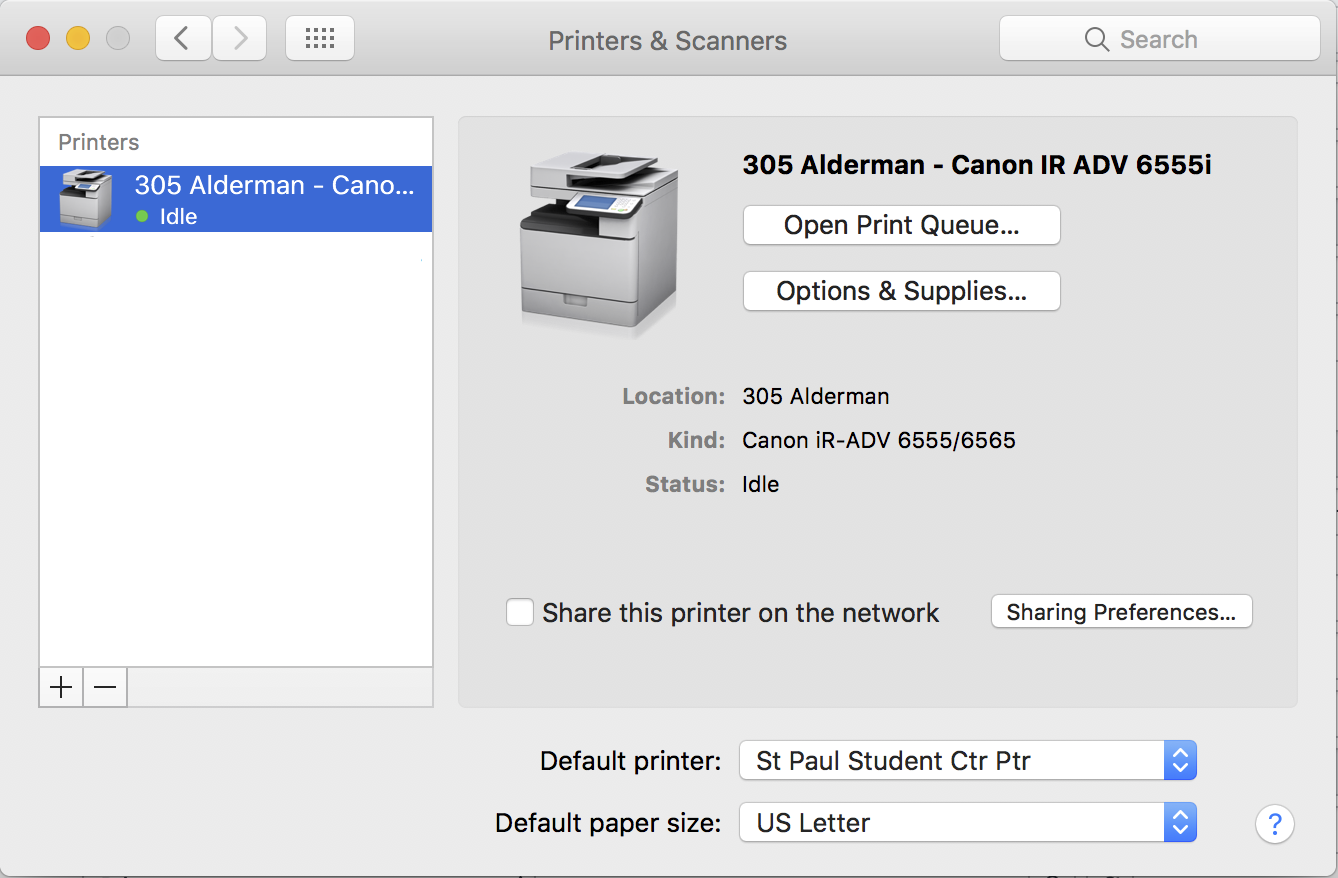
- From the Apple menu, launch System Preferences
- Click on Printers & Scanners
- Double-click on the newly added CFANS printer
- Select the Printer menu in the menubar
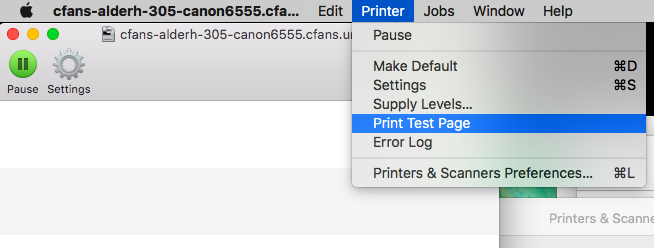
- Click Print Test Page
- From the Apple menu, launch System Preferences
Troubleshooting
Installer Not Present in Self Service
If you do not see the printer in Self Service, please contact the Technology Help Desk and request Self Service access for the printer installer.
Prompt Not Appearing for Departmental ID
Make sure you are using the System Print Dialog when printing. Note that Safari and Google Chrome do not use the System Print Dialog when printing by default.
- In Chrome, press Cmd+Shift+P to launch the dialog
- Safari users will need to manually add the Departmental Code to the driver and setup a preset for the printer
Manual Method
This method should be used only when it is not applicable to use Jamf Self Service.
Driver Installation: Install Canon C6555 driver
The Canon software (driver) for this printer must be installed prior to completing the steps below.
Administrative access will be required to install this software. If you do not have administrator privileges on your computer or access to Make Me Admin for temporary privileges, contact your local IT support or Technology Help.
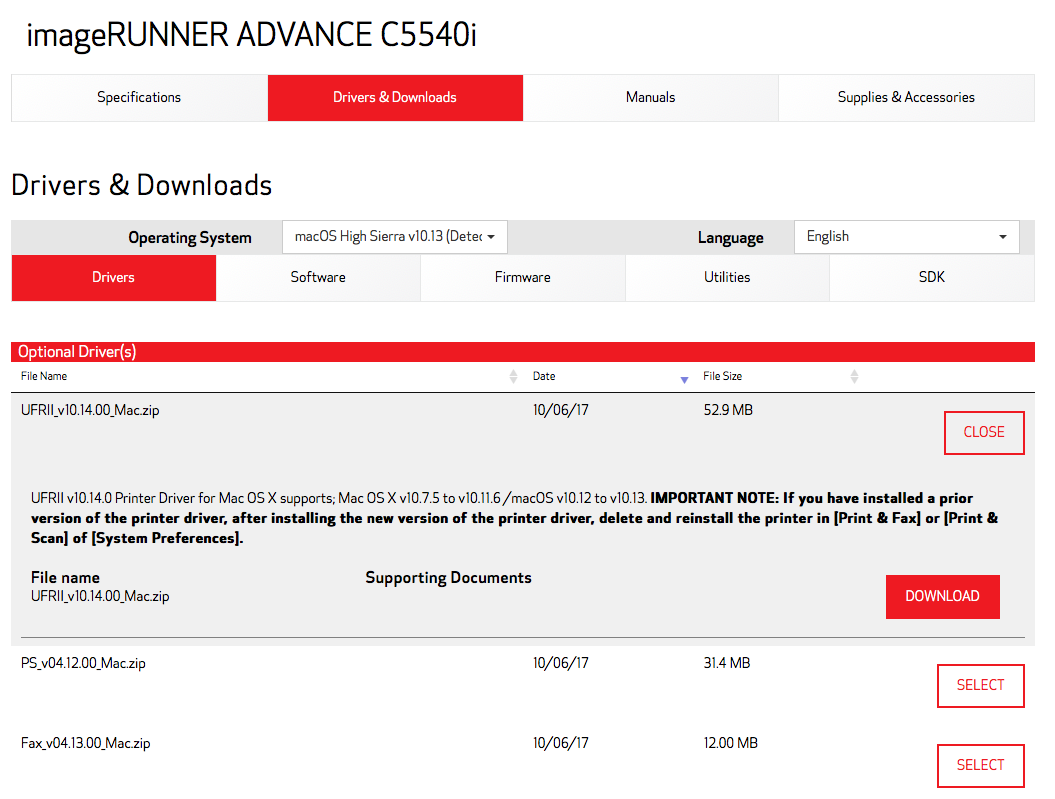
- Download the driver from the Canon C6555 Driver Software page
- Select the UFRII Printer Driver option
- Open the .DMG downloaded file that was downloaded
- Right-click (or Control-click) on the file called UFRII_LT_LIPS_Installer.PKG and select Open
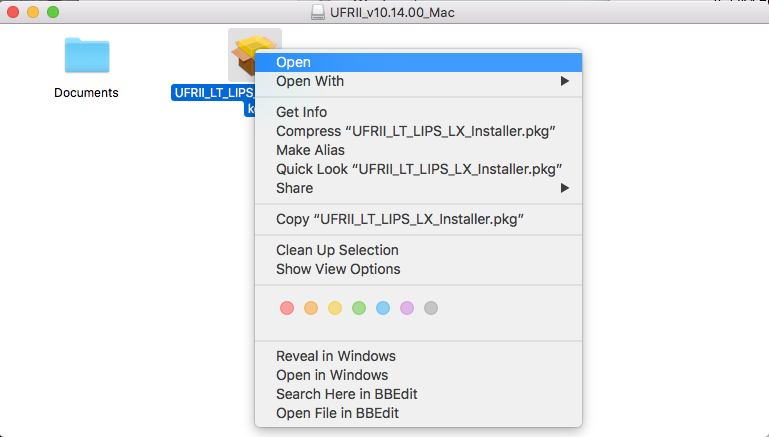
- Follow the prompts to complete the installation, entering your admin password when prompted
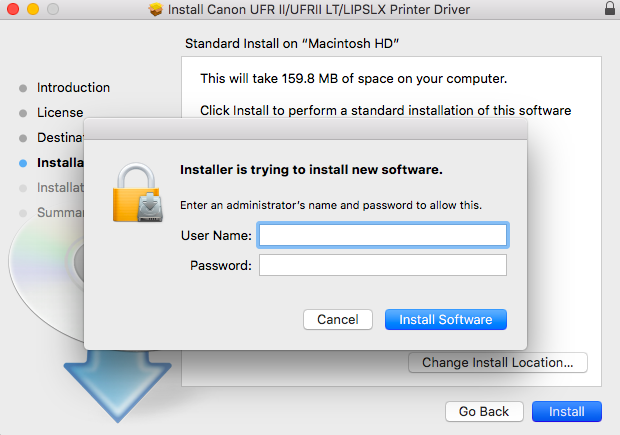
- Close the installer when it is complete
Printer Setup:
After the driver has been installed, the printer can be set up through the following steps.
- In the Apple menu
 , select System Preferences€¦
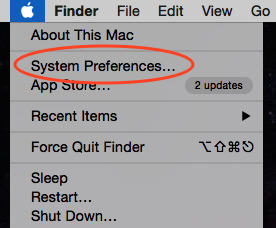
- Select the icon for Printers & Scanners
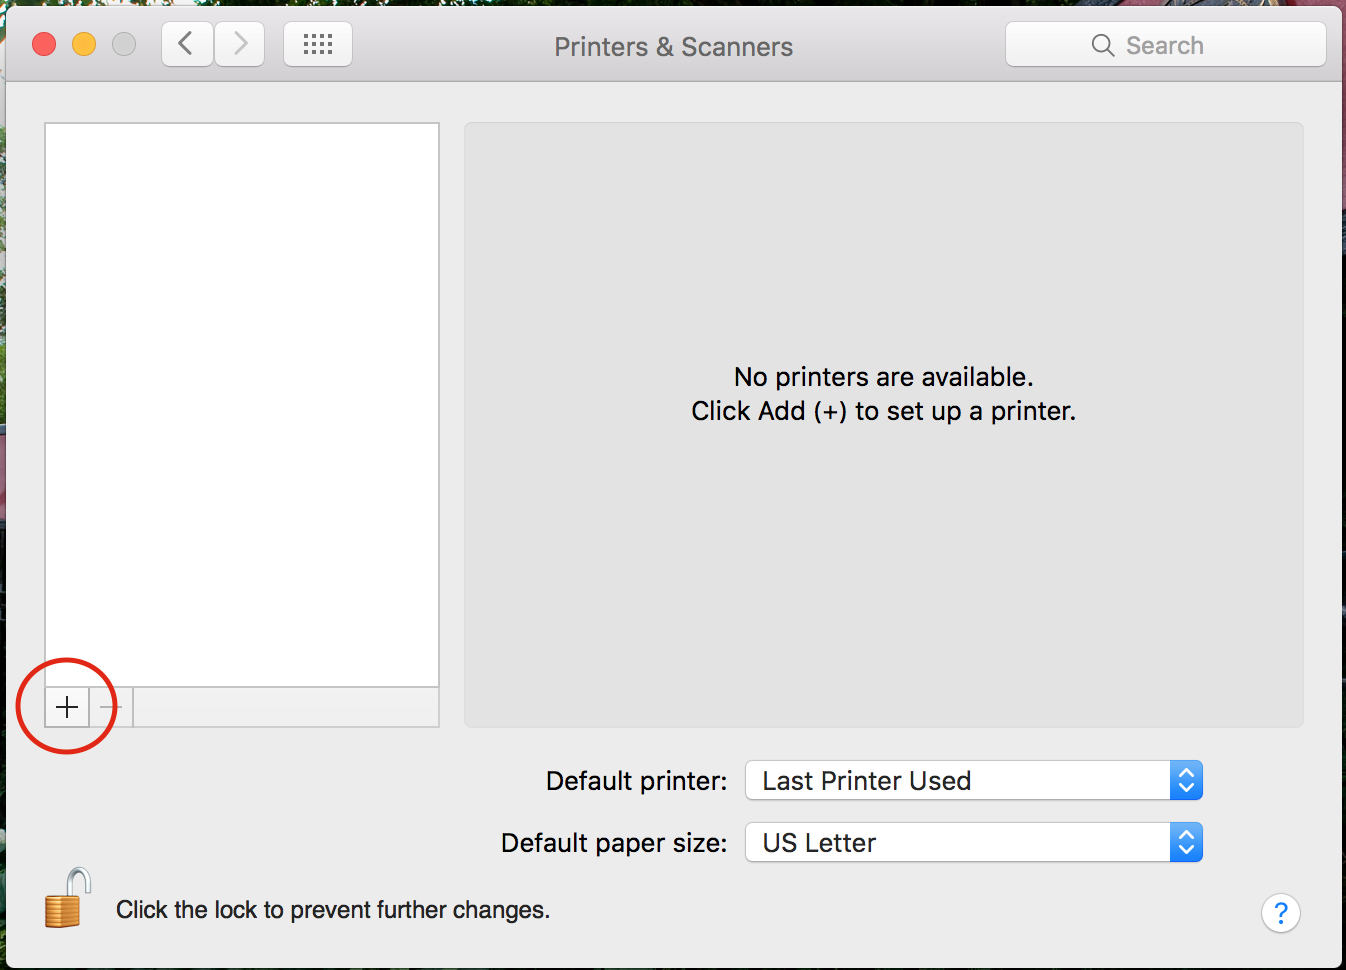
- Click on the (+) icon near the bottom of the sidebar
- Choose IPat the top of the new window
- Type cfans-alderh-305-canon6555.cfans.umn.edu into the Address field
- Verify that the Protocol dropdown is set to Line Printer Daemon - LPD

- Select the Use dropdown and choose Select Software€¦
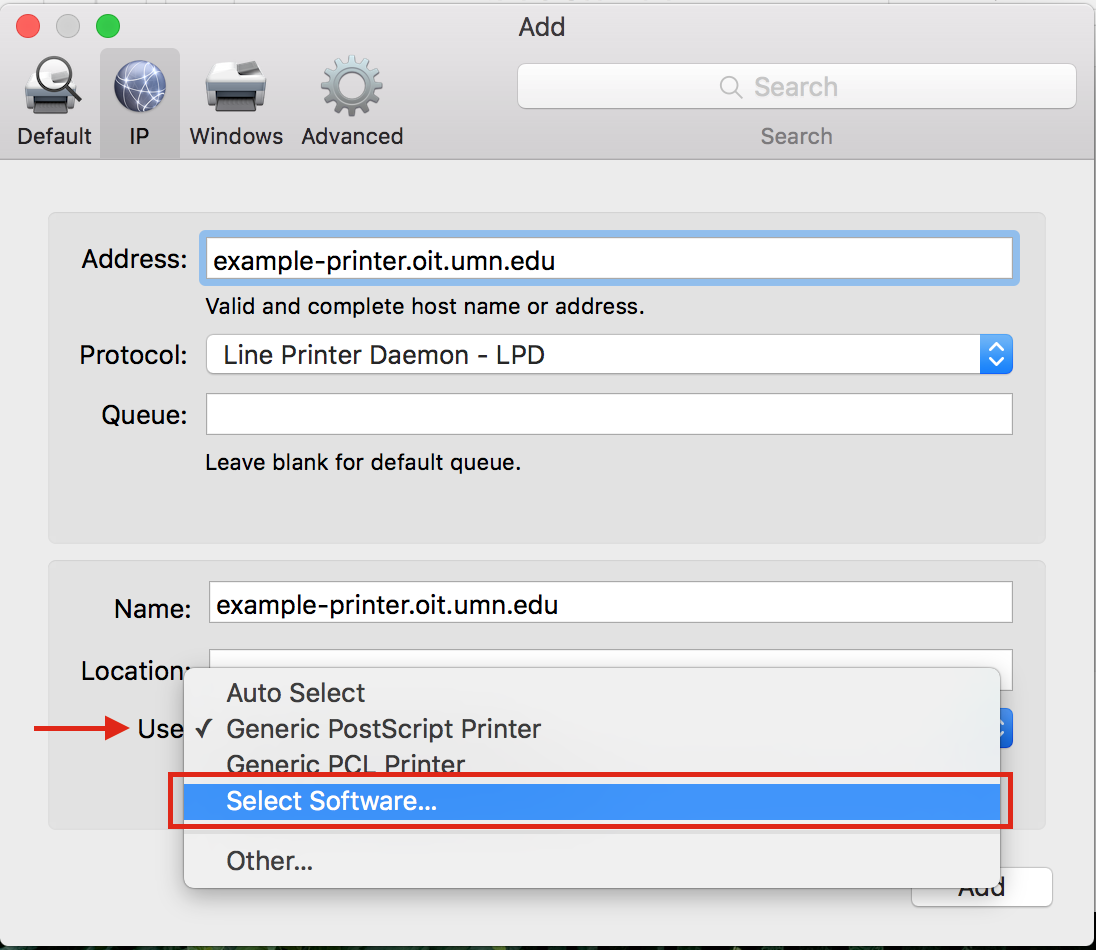
- Enter canon 6555 in the Printer Software window that appears
- Select Canon iR-ADV C6555/6565
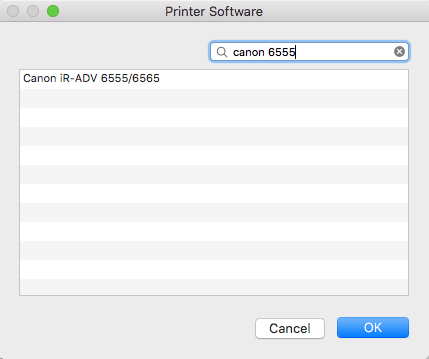
- Click OK
- Select Canon iR-ADV C6555/6565
- Click Add to add the printer
- Once the printer has been added, select it from the list of printers
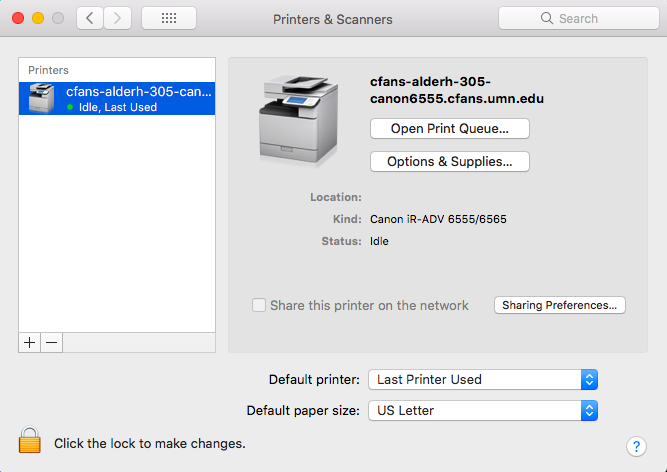
- Click on Options and Supplies
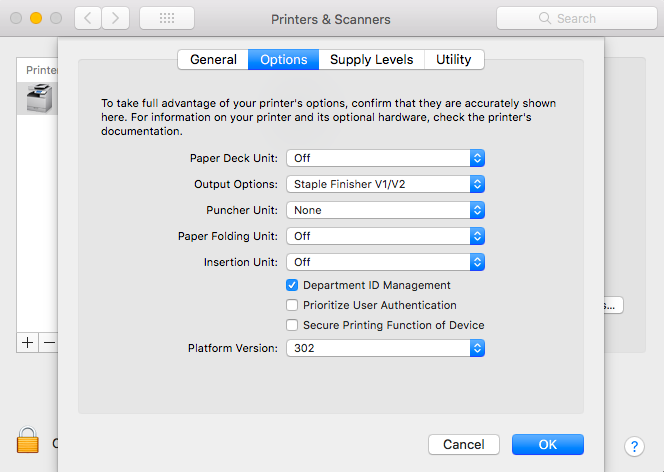
- In the Options section:
- Under Output Options, select Staple Finisher V1/V2
- Check the box for Departmental ID Management
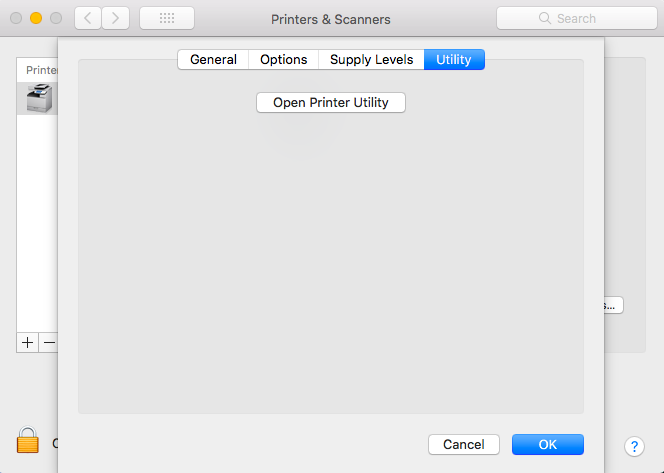
- In the Utility section:
- Click Open Printer Utility
- In the Authentication Function section:
- Change the User Management: dropdown to Department ID Management
- Enter your Department ID (i.e., Print Code or User Code)
- Leave the PIN field blank
- Uncheck Confirm Department ID/PIN When Printing
(If you use multiple ID's for printing, leave this checked so that a pop-up will appear, allowing for the ID to be changed when printing)
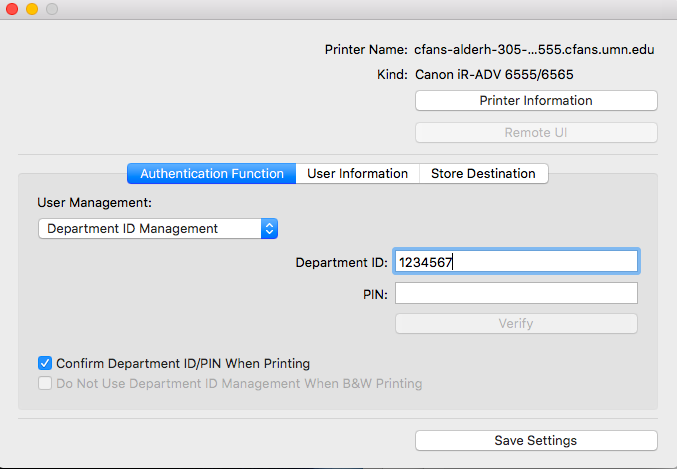
- Click Save Settings
- Close the window
- Click OK on the previous dialog
- In the Options section:
- The printer is now ready to use
Additional information
Contact the Technology Help Desk if you need assistance adding the printer to your computer.
Changing the Default Printer on a Mac
To set or change your default printer on a Mac, you can follow the steps listed in Set your default printer (Mac).
Apple Device Management: JAMF Pro FAQ
For more information on the JAMF Pro management service through UMN, see Apple Device Management.