
While the preferred method to create Cases is using the Find Contacts button sometimes you'll need to enter a Case for a parent, guardian, or other person who may not be in Peoplesoft. In that situation a Contact should be created separately and a Case can then be created from that Contact record.
Check with your internal business processes to validate when you should be creating a Case from a Contact record instead of using Find Contacts.
Creating a Case from a Contact Record
- Either Search for an Existing or Create a New Contact.
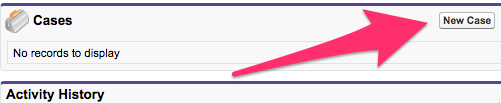
- From the Contact record scroll down beyond the Contact Detail to the section labeled Cases where you are able to click the New Case button.
- Note: If you have Setup a Default Record Type for Cases you will be brought directly to the New Case Edit screen.
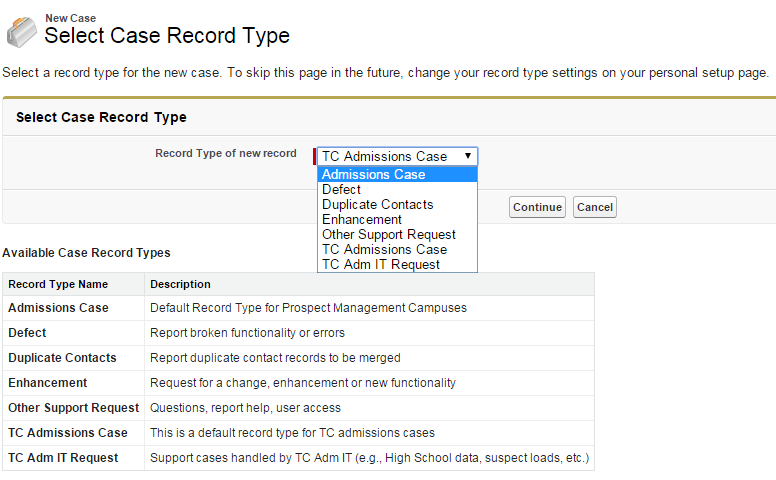
- If you have not set a default Case Record Type you will be brought to the Select Case Record Type screen where you should select the appropriate type from the dropdown per your business practices.
- Note: The Case Record Type will determine exactly which fields from the outlined below you are going to be seeing, which are required, and what the available values within the dropdown menus will be.
- Once you have selected the desired type click Continue. This brings up the New Case Edit screen.
- Once on the New Case Edit screen what you fill in will largely be determined by business practices. A list of potentially available fields and brief description of the intent and/or good practice for each is below. As always, refer to your internal business processes for how your business unit is using these fields and would like them to be filled out.
- Contact Information
- Contact Name will be defaulted to the record that you have just created the Case from and should not be modified here.
- Parent/Guest Contact allows you to use the Lookup icon to search for and associate a Contact record as a Parent/Guest for the student if needed.
- The Parent/Guest checkbox allows you to indicate whether or not there is a Parent/Guest affiliated with the Case.
- Parent/Guest Name allows you to type in a name if your workstream does not require you to create a Contact record for the Parent/Guest.
- The University Staff checkbox allows you to indicate whether this Case is affiliated with any University staff members.
- The Other checkbox is available to be used per your internal business processes.
- Case Information:
- Case Owner will default to you and cannot be changed at this time.
- Note: Depending on the setup of your Case Queues the owner may stay you after the Case is created or this may change based on your selection in Case Origin.
- Check with your internal business processes to ensure that any selections made here will result in the Case being in the correct Queue.
- If the Owner stays you, once the record is created you'll be able transfer the Case as needed.
- Priority is a dropdown menu that may change by Case Record Type chosen.
- Case Origin is a dropdown menu that may change by Case Record Type chosen.
- Origin Detail is a dropdown menu that will change based on choices made in the Case Origin dropdown.
- Case Record Type will be the selection you either have defaulted or made in Step 5 and cannot be changed at this time.
- Status is a dropdown menu that may change by Case Record Type chosen.
- Status Reason is a dropdown menu that will change based on choices made in the Status dropdown.
- Unit Referred To is a dropdown menu that will change based on choices made in the Status Reason dropdown.
- Sub-Unit Referred To is a dropdown menu that will change based on choices made in the Unit Referred To dropdown.
- Term is a dropdown menu that allows you to choose a term to associate with the Case.
- Year is a text box that allows you to type in a year to associate with the Case. The format should be the four-digit year, i.e. 1995 or 2015.
- The Marked for Trash checkbox allows you to indicated whether the Case is trash and should be deleted.
- The Has New Email checkbox will be automatic when new emails arrive and can also be manipulated per your internal business processes as needed.
- Case Owner will default to you and cannot be changed at this time.
- Area/Category/Topic: All of the available options that will show for you in the Area/Category/Topic dropdown menus will be determined by the Case Record Type selected when creating the Case and should be filled in according to internal business processes.
- Area - Primary will allow you to select a Area for the Case and will dictate what you will have available in the Category - Primary dropdown.
- The selection here will also be appended to the Subject field when the Case is created.
- Category - Primary will allow you to select a Category for the Case and will dictate what you will have available in the Topic - Primary dropdown.
- The selection here will also be appended to the Subject field when the Case is created.
- Topic - Primary will allow you to select a Topic for the Case.
- The selection here will also be appended to the Subject field when the Case is created.
- Area - Secondary will allow you to select a second Area for the Case, if needed, and will dictate what you will have available in the Category - Secondary dropdown.
- Category - Secondary will allow you to select a second Category for the Case and will dictate what you will have available in the Topic - Secondary dropdown.
- Topic - Secondary will allow you to select a second Topic for the Case.
- Area - Primary will allow you to select a Area for the Case and will dictate what you will have available in the Category - Primary dropdown.
- Description Information
- The Subject field allows you to enter a subject for the Case, it should be brief and descriptive.
- Note: Your selections for Primary Area, Category, and Topic will be appended here when the Case is saved.
- Description is a text field that allows you to give a summary of what the Case is about.
- Note: When Cases are automatically created via an email the original email message will show in this field. Check with your internal business processes to ensure you're putting the desired information here.
- You are only able to have one description while you can have many Comments on a Case. This may affect how your business unit chooses to use these fields.
- The options in the Comment Category dropdown menu will vary based upon the Case Record Type selected and can be chosen here in accordance with your internal business processes.
- Note: This field will send information back to Peoplesoft.
- The Comments field is a text box that allows you to put in comments about the Case.
- Note: Comments added here will show in the Chatter feed for this Case.
- The Comments field allows you to add details to your selected Comment Category and will send additional information back to Peoplesoft.
- The Subject field allows you to enter a subject for the Case, it should be brief and descriptive.
- Contact Information
- Once all the information is filled out per your internal practices the action you take next will depend on the current workflow.

- Choosing Save will finalize your changes and bring you to the Case record.
- Choosing Save & Close will bring you to the Close Case screen where you can choose a Close Status, update Area/Category/Topic options if needed, and fill in the Solution Information per your internal business processes.
- Choosing Save & New will finalize your changes and bring you back to Step 5 or 6 depending on your personal settings.