If you have a customer that has no EMPLID or UMN Email to pull from Peoplesoft into CRM and you have verified that their information also does not currently exist within CRM then you will need to create a Contact record. The instructions below show how to manually create a Contact record outside of any other potential data load streams that your business unit may use to get Contacts into the system.
- If you are creating a Contact for a new Case and only need to enter basic contact details such as email, address, phone, and fax you are able to create the new Contact from a Case record.
- If you need to fill in more fields for the contact, are creating the record independently of the Case workflow, or need to create multiple Contact records at the same time you will want to follow the instructions to create a Contact from the Contacts Tab within the Service Console.
Creating a Contact from a Case record
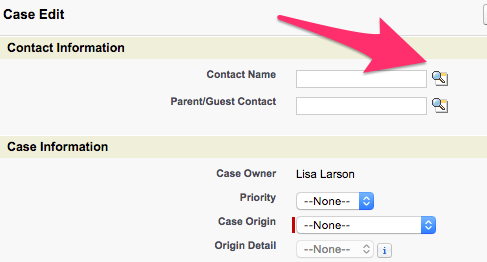
- From the Case Edit screen click on the Lookup icon next to the box for Contact Name.

- This brings up the Lookup screen where you would also be able to search for a Contact that is already within Student Services CRM to associate with the Case. Instead of searching and clicking Go! however, click on the New button to the right of the Search Bar.

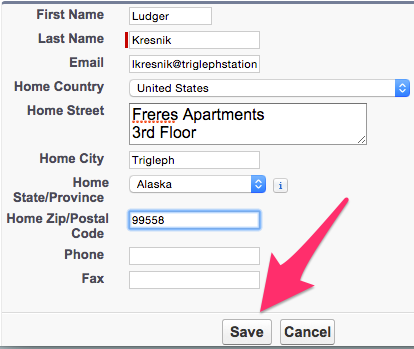
- The Lookup screen will change from a List of Recent Contacts to a place where you are able to fill in the necessary information to create the Contact.
- Note: The only required field here is Last Name but your business processes may require you to gather other information.
- Check with your internal business processes to ensure that all necessary information is being collected from the contact.

- Once you have filled out all of the necessary fields clicking on Save will create the Contact within CRM and associate the Contact with the Case that you are creating.

Creating a Contact from the Contacts Tab within the Service Console
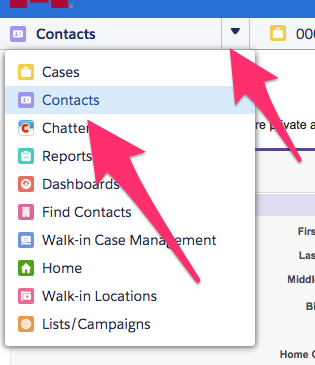
- Use the arrow to bring up the dropdown for the Service Console Navigation Tab and select Contacts.

- From the Contacts Tab click on the button for New Contact.

- This brings up the Contact Edit screen where information is able to be entered.
- Note: Although Last Name is the only required field you may want to check with your internal business practices to see if you are required to fill in any other details.
- If you would like to create another Contact immediately click on Save & New at the top or bottom of the page to be brought to another New Contact Edit page and proceed from Step 3 and fill in required information.

- If you are done entering all of the Contact information click on Save to be brought to the Contact record.

