
Once Assignment Groups have been created different Users can be assigned and indicate whether or not they should be receiving Cases through this assignment. This article goes over instructions for Adding Assignment Group members.
Adding Assignment Group Members
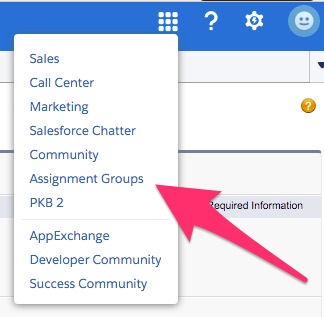
- Expand the App Menu and select Assignment Groups from the list. This brings up the Assignment Groups App.
- Once on the Assignment Groups App click on the Assignment Groups Tab if needed.

- Once on the Assignment Groups Tab if you are not seeing the desired Assignment Group in your default View use the View: menu and click Go! to get it to show in the list.

- Once visible click on the Group Name to bring up the Assignment Group record.

- From the Assignment Group record click on the New Group Member button. This brings up the New Group Member screen.

- Once on the New Group Member screen use the Lookup icon to search for and associate a User to assign to the group.

- The Active checkbox here is what will indicate if the User is part of the Round Robin Assignment at this time.
- If you'd like them to receive Cases select True, otherwise select False.

- If you'd like them to receive Cases select True, otherwise select False.
- If you are adding multiple Users click on the Save & New button to be brought back to the New Group Member screen.

- If you are done adding Users click on Save to be brought to the Group Member screen.
