What is an Assignment Group?
Assignment Groups allow you to use Round Robin assignment for Cases, so that you can choose a group of individuals who will get assigned Cases as they come in.
Creating a New Assignment Group
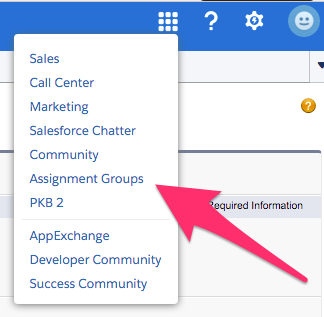
- Expand the App Menu and select Assignment Groups from the list. This brings up the Assignment Groups App.

- Once on the Assignment Groups App click on the Assignment Groups Tab if needed.

- Once on the Assignment Groups Tab click on New at the top of the screen. This brings up the New Assignment Group screen.

- The New Assignment Group screen is where you will choose options that will affect how the Assignment Group works:

- Group Name will show for anyone managing the Round Robin Assignments for this group and should be something meaningful to those audiences.
- The Assign by Email checkbox is available to indicate if you'd like ownership to be assigned based on emails received on the Case.
- The Case Email should be the email address used to generate Cases from if the Assign by Email checkbox has been checked off.
- Description allows you to put information about the assignment group to either convey information to other Users or to make the Assignment Group easier to find.
- The Type dropdown currently defaults to the only available option of Case so can be left alone.
- Once you have filled out all of the information as desired click on Save at the top or bottom of the screen to be brought to the Assignment Group record.
- On the Assignment Group record to assign a Queue for the Assignment Group click on the New AG-Queue button below the Assignment Group Detail that allows you to select a Queue for Cases to get assigned to. This brings up the New AG-Queue screen.

- From the New AG-Queue screen paste or type in the desired Queue Name and choose either Active or False from the Active dropdown in indicate if the Queue should be active or not.

- Once all of the desired information has been filled in click on Save at the top or bottom of the screen to be brought to the Assignment Group record.
