The Zoom for Canvas Integration allows you to start and join Zoom meetings from within Canvas. This article is for UMN faculty and staff who would like to use Zoom together with Canvas.
Note: Students are not able to create or host their own meetings from within Canvas.
In this article:
- Zoom for Canvas Overview
- Zoom and Canvas Accounts
- Adding Zoom to Canvas courses
- Managing Meetings
- Sharing Local Recordings in Canvas Using Kaltura
- Managing Zoom Cloud Recordings
Zoom for Canvas Overview
The Zoom for Canvas Integration allows UMN faculty and staff to use the following Zoom features from within Canvas:
- Schedule Zoom meetings
- List upcoming Zoom meetings
- Join Zoom meetings
- Create Calendar events for Zoom meetings
- Create Canvas Conversations about Zoom meetings
- Record Zoom meetings to the cloud
The Zoom for Canvas Integration does not allow faculty and staff to create breakout rooms before the Zoom meeting within Canvas. Learn more about Zoom breakout rooms.
Zoom and Canvas Accounts
You must have accounts in both Zoom and Canvas in order to use the Zoom for Canvas Integration.
If you are in the Health Care Component (HCC), make sure you have taken the required training in order to gain access to Zoom. Your account will have the same Zoom privileges and restrictions within Canvas as it does outside of Canvas. Learn more about HCC and non-HCC instances of Zoom at the University of Minnesota.
Adding Zoom to Canvas Courses
You need to add the Zoom integration to each Canvas course you want to use with Zoom.
- Log into zoom.umn.edu.
- In the same browser, log into canvas.umn.edu.
- In Canvas, select the course you would like to add Zoom to.
- In the course navigation menu on the left-hand side of the screen, select Settings
- Select the Navigation tab.
- In the list of menu options, locate Zoom within the list.
- Select the Settings icon to the right

- Select Enable

- At the bottom of the page, select Save.
- When you access Zoom for the first time through the course navigation menu, you will need to select the Authorize option in order to proceed.
Scheduling a Meeting
These instructions are for UMN faculty and staff only. UMN students cannot schedule meetings through the Zoom for Canvas Integration.
After adding Zoom to a course, you can access the Zoom tool from the course navigation menu. Then you can schedule a meeting.
- Select Zoom from the left-hand course navigation menu.
- Select Schedule a New Meeting.

- Follow the same steps to schedule a single Zoom meeting that you would use outside of Canvas.
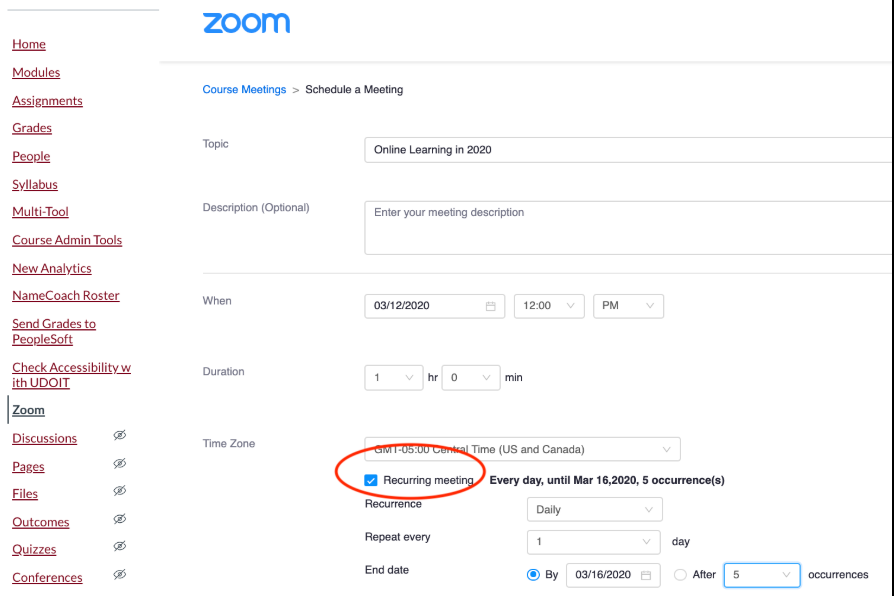
- To schedule a recurring meeting, select the Recurring Meeting checkbox. You are able to set the following features:
- How often the meeting recurs
- How many sessions, or occurrences, the meeting will have
- The date of the final occurrence
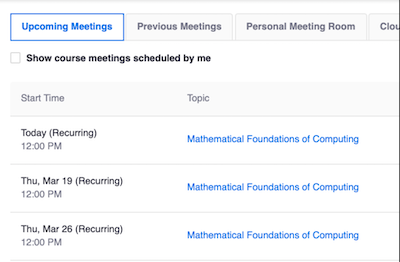
- You can view details about your recurring meetings in the list of upcoming meetings. In the example below, "Mathematical Foundations of Computing" is a weekly meeting with three occurrences.
Starting a Meeting
If you have scheduled a Zoom meeting using the Zoom for Canvas Integration, you can start the meeting from within Canvas.
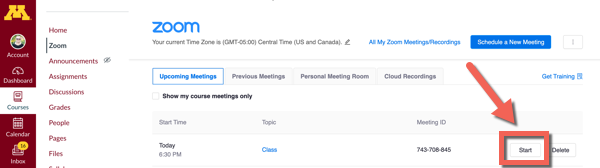
- In Canvas, select Zoom from the course navigation menu
- Select Upcoming Meetings
- Select Start to the right of the Meeting ID of the meeting you wish to start.
Note: You may launch any Zoom Meetings created with your UMN Zoom profile by selecting "All My Zoom Meetings/Recordings."

Displaying Meetings
To display upcoming meetings, select the Upcoming Meetings tab.
Note: All time-related information in Zoom is based on the time zone of your Canvas Account Profile, rather than the time zone specified in your Zoom account.
To display previous meetings, select the Previous Meetings tab.
Deleting a Meeting
Only the meeting creator can delete a meeting scheduled using the Zoom Canvas Integration.
- On the Upcoming Meeting list, select Delete next to the meeting you wish to delete.
- Select OK in the pop-up box. The meeting is removed from the Canvas Calendar.
- A new Canvas Conversation notifies course members that the meeting has been deleted.
Automatically Updating the Canvas Calendar
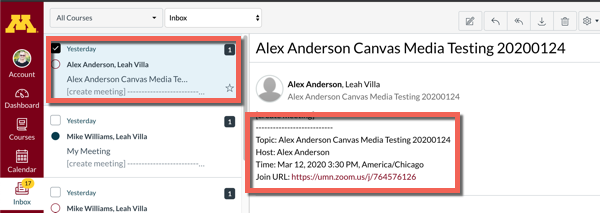
Canvas users are notified by Canvas Conversation and a Canvas Calendar Event whenever a meeting is created or deleted. When you schedule a meeting, the Canvas Calendar updates.
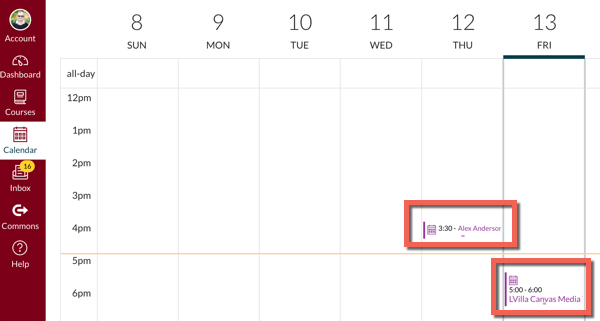
People who are enrolled in the course receive a Canvas Conversation message about the meeting. Students can select the Join URL to join the meeting at the correct time. You may need to reach out to students directly if they have not set up Canvas notifications to their UMN email address.
Sharing Recordings in Canvas Using Kaltura
UMN faculty and staff with and without HCC Zoom accounts may create and save recordings on their local computers as well as to the Zoom cloud. Faculty and staff may also manage recordings of their Zoom/Canvas meetings from within Canvas.
In this article, recordings saved to your laptop or device are called local recordings.
Note for HCC Zoom Accounts: Although not recommended for recording Protected Health Information (PHI), users may use Zoom for this purpose if absolutely necessary. Zoom is a temporary storage solution, you should observe all standard best practices around the recording and storage of PHI. We recommend Box Secure Storage as the preferred method of retention for recordings containing PHI.
Note for all Zoom Accounts: It is not recommended to store all of your meeting recordings in the cloud because Zoom recordings are only retained for:
- Non-HCC accounts - 180 days
- HCC accounts - 30 days.
Further, saving a recording locally will result in higher image quality.
Note for non-HCC Zoom users: Consider enabling the Zoom: Cloud Recording to Kaltura Integration to automatically send new Zoom cloud recordings to Kaltura for longer-term storage and usage.
If you record more than a couple of class sessions with the Zoom for Canvas Integration, download your Zoom recordings using the Download a Recording steps below, upload them to Kaltura, and share in Canvas following the steps in:
- Canvas: Add Media from Kaltura using the Rich Content Editor
- Canvas: Add, Remove, and Import Videos in the Media Gallery
For more information on uploading recordings, please refer to these Tips for Reducing Upload Times for Local Recordings
Managing Zoom Cloud Recordings - For Faculty and Staff
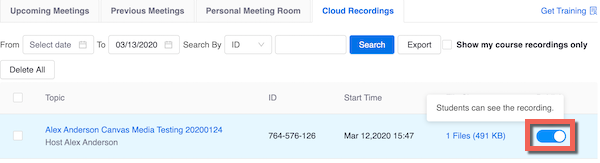
Displaying Recordings
Displaying recordings allows students to see your recordings.
- In Canvas, select Zoom from the course navigation menu
- Select the Cloud Recordings tab. A list of your recorded meetings displays. You can play, share, or download recordings.
- To ensure that students can see the recording, toggle the Publish button.
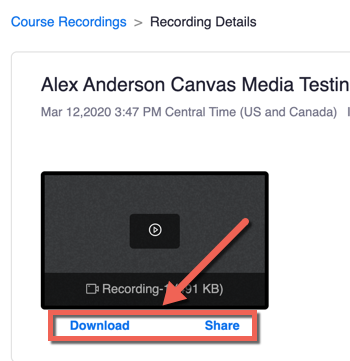
Downloading a Recording
- Select the Cloud Recordings tab to see the list of your recorded meetings.
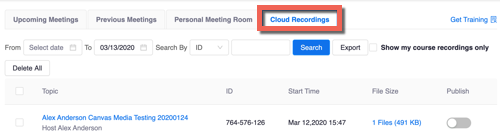
- Select a meeting title to see the recordings available for that meeting.

- Select the Download link below a recording to download that file to the computer you are using.
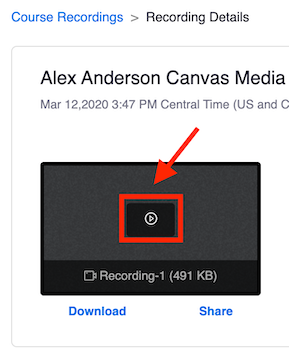
Playing a Recording
You can play a previous recording from within the Zoom in Canvas Integration.
- Select the Cloud Recordings tab to see the list of your recorded meetings.
- Select a meeting title to see the recordings available for that meeting.
- Select the Play icon of the recording. The recording opens in a new tab.
Deleting a Recording
- To delete all recordings associated with a particular meeting, select Delete All on the Cloud Recordings tab.
- To delete a single recording select Delete next to the recording you wish to delete.
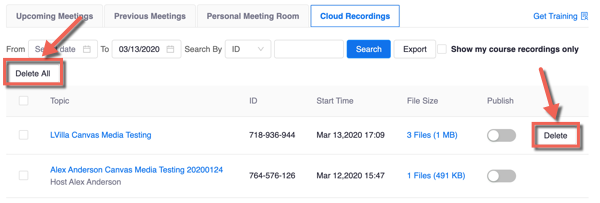
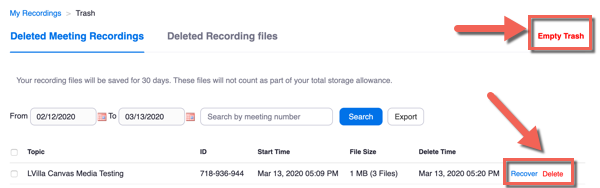
If you take no further action, recordings stay in the trash for 30 days before deleting. You may wish to recover a deleted recording, or to permanently delete recordings.
To recover or permanently delete a recording that is in the trash:
- Go to your Zoom account at zoom.umn.edu and log in.
- Select Recordings.
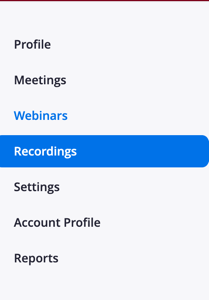
- In the Cloud Recordings tab, select Trash.
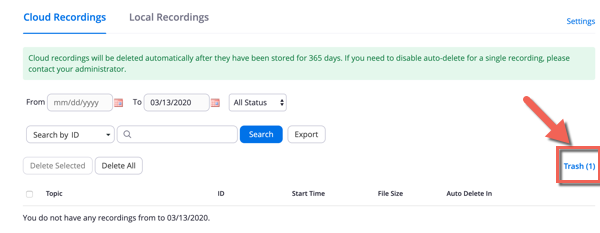
- Select Recover, Delete or Empty Trash.