Member Statuses are a way to communicate information and report on results of an Outbound Calling Campaign. If a Query is run prior to changing the Member Status options, the pre-selected Default status will apply to all List/Campaign Members that get added at that time and will stay with that List/Campaign Member record until manually changed.
If a Query Refresh has already been performed on the List/Campaign, there may also be a Member Status of Excluded by Query Refresh showing - this is a system-generated Member Status that will show if a member that was included in a first refresh but then was excluded by any updated fields on a subsequent refresh.
The Member Statuses can be customized to create statuses that are meaningful to the team. Examples of useful Member Statuses include To Be Called as a potential Default, and statuses such as Left Voicemail, No Answer, Successful Call, or Sent Additional Information.
NOTE: It is not recommended to use Completed as a Status. The tool uses Completed as a default Status on several record types and this can cause unnecessary confusion.
Once a Default is selected and a Query is refreshed on the List/Campaign record, the Default will show on all members added with that refresh. Any members that have been added prior to the change will show the same status as before the Refresh.
Modifying Member Status Values
If needed Navigate to the List/Campaign record
- Click on the Lists/Campaigns Tab from your homepage if showing in your default tabs or click on the All Tabs (+) button and select Lists/Campaigns from the list.
- On Lists/Campaigns Home find the List/Campaign that you'd like to update either by clicking on the Name from your default view or by searching the appropriate dropdown selection in the View: menu and clicking Go!
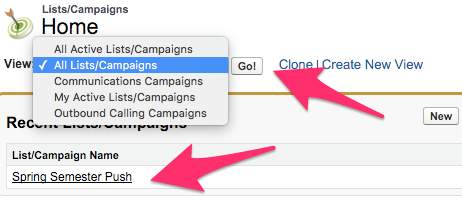
- Once the appropriate List/Campaign is visible, click on the List/Campaign Name in the list to bring up the List/Campaign record.
Once on the List/Campaign record
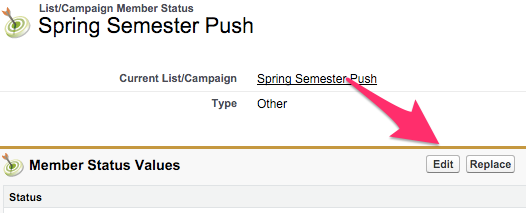
- From the top of the List/Campaign record screen click on Advanced Setup. This brings up the List/Campaign Member Status screen.

- From the List/Campaign Member Status screen click on Edit.
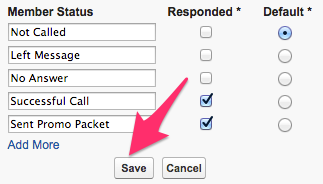
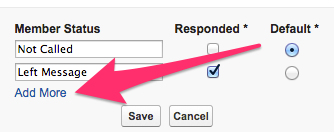
- Modify the default statuses as desired, keeping in mind that there must be one Default value, and there can only be one.
- To create more available Member Statuses, click on Add More under the Member Status text boxes.
- Depending on the status value and internal business processes the checkbox for Responded can be checked or unchecked as desired.
- Check with your internal business processes to determine what values should be filled in.
- Continue to add more Member Status options as needed and when done click Save.