
Campaigns can be created to assign staff to call a subset of Prospects and provide information to them or solicit information from them. The List/Campaign record is where all the components of who is on the list and who calls them live and interact.
Prior to creating a new campaign, it is advisable to have already setup a Script and any Queries and/or Caller Groups you'd like to associate with the Outbound Calling Campaign.
Creating a New Outbound Calling Campaign
- Click on the Lists/Campaigns Tab from your homepage if showing in your default tabs or click on the All Tabs (+) button and select Lists/Campaigns from the list.
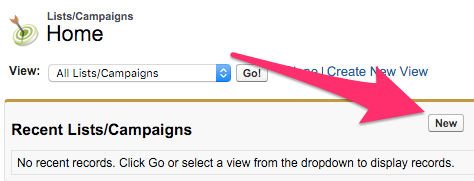
- At Lists/Campaigns Home, click on New.
- From the Select List/Campaign record type drop-down menu, choose Outbound Call Campaign and click Continue. The List/Campaign Edit screen displays the available fields for manipulation.

- Follow your internal business processes to determine which fields to use and how. Below are some field definitions and good practices:
- Type can be used to classify the campaign.
- The Event field connects with old Visit Option / Event records, if you are using the Events App to create your Visits or Events do not use this field.
- Contact Delay means that if someone is called they will not show in the list for the same or any other campus campaigns for the amount of hours specified.
- Note: this is campus specific only - other campuses could have the same contact in another campaign and the Contact Delay will not affect their ability to see that contact.
- Contact Delay Override allows you to override a previously set Contact Delay when checked.
- Calling Script allows you to use the Lookup icon to associate a Script with a campaign that employees managing the campaign will be able to see and use.
- Parent List/Campaign allows you to use the Lookup icon to find another campaign to associate as a parent. This can make navigation and planning easier in some cases (for example, a yearly campaign can be a parent with quarterly pushes being children).
- Status can be used to communicate information, such as Completed or In Progress, to other Users who may see the campaign.
- When checked, the Active checkbox will ensure that the campaign appears in the list of any default or customized view that is looking for active List/Campaign data.
- Start Date and End Date are important because they dictate whether or not assigned Caller Groups are able to see the campaign - they will not be able to see anything prior to the Start Date or after the End Date.
- Member Refresh Status fields are automated fields and cannot be manipulated at this time.
- Description is an optional text box to add a description for the campaign. This can be helpful in differentiating between List/Campaigns with similar names and can be searched to help find the List/Campaign later as well.
- Once all desired fields are filled out, click Save.
- IMPORTANT: After clicking Save, go into Advanced Setup and modify the Member Status values. These values can be modified at a later time, but once a query is run you will not be able to change the default status on campaign members added by that initial Query Refresh.
- Once the desired Member Status values are set, the campaign is ready and Queries, Caller Groups, and Scripts (if not already selected in Step 4) can be added or modified.