University of Minnesota students, staff, faculty, departmental, and sponsored accounts can livestream from Zoom meetings or webinars to Youtube Live and other streaming services. This is a good option for users who need to reach an audience larger than 300 participants.
Note: Livestreaming meetings is disabled for users in the Health Care Component (HCC - BAA/BAA+). Streaming webinars are allowed.
If this will be your first time livestreaming with Zoom, set up a practice meeting well in advance of the event to become familiar with the process.
In this article:
- Steps to Perform in Advance of the Livestream
- Steps to Complete Immediately Before Your Livestream
- Using Live on YouTube to Go Live Instantly
- Stopping the Livestream and Ending the Meeting
- Additional Resources
Steps to Perform in Advance of the Livestream
Scheduling Your Meeting in Zoom
- Schedule your Meeting in Zoom: Scroll down to find the instructions for your operating system (i.e.Windows, Mac, iOS, Android) or the Zoom web portal. Click on a section to expand the instructions.
Enabling the Livestreaming Feature
- Login to your Zoom Meeting Settings.
- Scroll down or click In Meeting (Advanced) in the left-hand navigation links to find Allow live streaming meetings.
- Click the toggle switch to enable livestreaming. Four checkboxes appear.
- Check the boxes for where you would like to livestream to:
- Uncheck Facebook and Workplace from Meta unless you plan to use them so that your meeting interface stays less cluttered.
- YouTube: Checking YouTube allows you to set up livestreaming with a University-connected YouTube account.
- Note: Setting up YouTube to work with Zoom for the first time requires you to go through the livestreaming process immediately, without testing. Make sure you are ready to go live with a test meeting when using this option.
- Check Custom Live Streaming Service to set up livestreaming before your meeting using any service besides Workplace from Meta - including YouTube. A text box appears where you can enter any notes for hosts who will be livestreaming your meeting.
- If you do not wish to add notes, leave this box blank and select Save.

- If you do not wish to add notes, leave this box blank and select Save.
- Continue to the Setting Up Your Streaming Platform section below.
Setting Up Your Streaming Platform Ahead of Time
In order for a scheduled meeting to go live using the Custom Live Streaming Service option, you will need to obtain your:
- Stream URL.
- Stream key.
- Livestreaming page URL from your streaming platform.
This section covers how to set up your event and obtain these settings in Youtube Live, though you can also use a different streaming service of your choice.
- Login to YouTube.com with your UMN Internet ID and password.
- Select the Create a Video or Post button (camera with a plus symbol) in the upper right-hand corner of the Youtube homepage.
- Choose Go Live. A popup window opens where you fill out your livestream information.
- Create a channel if prompted. You must have a channel in order to use Youtube Live. There is no charge when creating a channel.
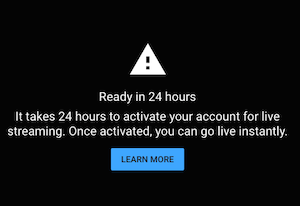
- Note: You may need to wait 24 hours to activate your account for livestreaming. Please plan accordingly.

- Note: You may need to wait 24 hours to activate your account for livestreaming. Please plan accordingly.
- You may also be prompted to verify your account via phone call or text message. This is intended to ensure that you are human. Once you have verified your account, return to step 2 above and select the Create a Video or Post button.
- Create a channel if prompted. You must have a channel in order to use Youtube Live. There is no charge when creating a channel.
- In the popup window:
- Create an Event title and add an optional description.
- Choose a category that best fits your stream from the dropdown menu.
- If you'd like, upload an optional thumbnail for people to see if they are searching for your livestream.
- Under Audience, select No, it's not made for kids.
- Select Yes, it's made for kids only if children are the primary audience for the stream.
- Select Next.
- Under Customization, select the options that best fit your needs.
- Select Next.
- Under Visibility, select the appropriate option.
- Public: Anyone can search for and view.
- Unlisted: Anyone with the link can view.
- Private: Only you can view.
- Note: Select private only for testing; otherwise no one else will be able to view your stream.
- Under Schedule, select the date and time for your livestream.
- Select Done.
- Select the video camera and microphone you will use for the stream.
- Select Go Live. You are now livestreaming.
- Select END STREAM.
- Select the Stream icon on the left.

- If you are scheduling a livestream, copy the Stream key and Stream URL and save the information for later in a word-processing document.

- In the upper-right, select the share button and copy the Video link. Add this link to your document with the Stream key and Stream URL.

Setting Up the Stream in Zoom
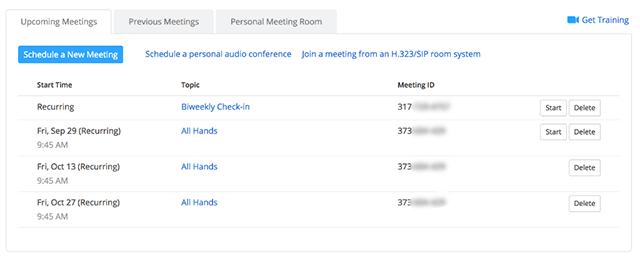
- Find the scheduled meeting you will livestream in your list of upcoming meetings.
- Select the meeting topic.

- Scroll to the bottom of the page and select the Live Streaming tab.

- Select configure live stream settings.

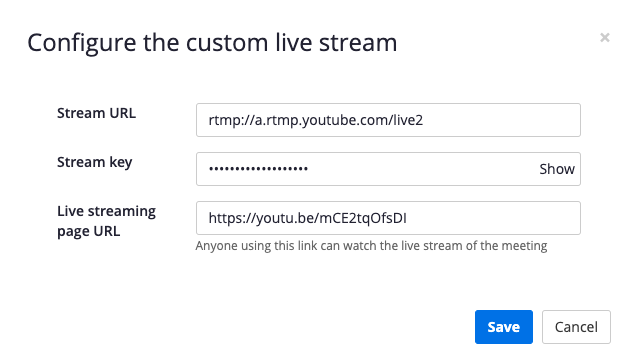
- A popup window opens with fields to input the Stream URL, Stream Key, and Live streaming page URL you saved from your streaming platform. Fill in each field and select Save.

Steps to Complete Immediately Before Your Livestream
Begin these steps at least half an hour before the start of your event.
- Start your Zoom meeting.
- Select the More... button on the Zoom meeting control toolbar.

- Choose Live on Custom Live Streaming Service.
- Note: This starts the livestream process with the settings you entered in the Setting Up the Stream in Zoom section above, and opens the livestream for viewing in your web browser. The livestream is not live on YouTube yet.
- Start your stream on your streaming platform.
- If using Youtube Live through Live on Custom Live Streaming Service, go back to your YouTube Live Stream window.
- If you do not have your livestream window open anymore:
- Click the Create a Video or Post button (camera with a plus symbol) in the upper right-hand corner of the Youtube homepage.

- Choose Go Live.
- Select the Manage tab on the left.

- Select the title of the stream that you just created.
- Select the Go Live button in the upper right-hand corner.
- Click the Create a Video or Post button (camera with a plus symbol) in the upper right-hand corner of the Youtube homepage.
- If you do not have your livestream window open anymore:
- If using Youtube Live through Live on Custom Live Streaming Service, go back to your YouTube Live Stream window.
Using Live on YouTube to Go Live Instantly
There may be situations where you would like to stream your meeting on YouTube and do not have a meeting scheduled ahead of time. You can choose to go live:
- In the middle of a Zoom meeting.
- After starting a new Zoom meeting.
- Directly from YouTube using your UMN account.
As a host, if you have enabled the YouTube option in your Zoom settings, you can go live on YouTube from within any Zoom meeting.

Going Live from Your Zoom Meeting
- From your Zoom meeting, click More...
- Select Live on Youtube. A new window opens, prompting you to select an account.
- Choose your UMN account.
- Note: If this is your first time connecting your account, you will be prompted to give YouTube access to Zoom, your webcam, and microphone.

- Note: If this is your first time connecting your account, you will be prompted to give YouTube access to Zoom, your webcam, and microphone.
- On the next screen, give your YouTube livestream a title and select your preferred privacy option for viewing:

- Public: Anyone can search for and view.
- Unlisted: Anyone with the link can view.
- Private: Only you can view.
- Note: Select private only for testing; otherwise, no one else will be able to view your stream.
- Select Go Live!Your livestream feed on YouTube opens.
Stopping the Livestream and Ending the Meeting
Ending the Livestream Using Custom Streaming Service
If you are using YouTubeLive, continue to the next section.
If you are streaming to Youtube Live using Live on Custom Live Streaming Service you can end the stream on YouTube.
- Click the End Stream button in the upper right-hand corner to end your broadcast.
- Continue to the next section.
Ending the Livestream and Ending the Zoom Meeting
- In the Zoom meeting, click the More... button in the meeting control toolbar.
- Choose Stop Live Stream.
- Click the End Meeting button on the meeting control toolbar to end your meeting for all participants. A confirmation box opens.
- Choose End Meeting for All.
Additional Resources
- Staff, faculty, departmental, and sponsored accounts can use the Zoom Webinar service to reach an audience of up to 1000 participants and can request temporary use of a license to have up to 2,999 participants in a Zoom webinar.
- If you are not a student and you want to livestream to Youtube Live, follow the instructions in the Streaming a Webinar on Youtube Live article in the Zoom Help Center for a simpler streaming option from a Zoom webinar.
- Zoom has a built-in integration to livestream meetings to Workplace from Meta, which is a paid service; however, OIT does not support Workplace from Meta. If you want to stream to Workplace from Meta and have paid for that service, follow the steps in Live Stream Meetings On Workplace in the Zoom Help Center.
