Walk-in Locations and Counters let you organize your Case and Staff assignment. The instructions below are for how to create a new Walk-in Location and Counters for that location.
If you are looking to review a current Walk-in Location's Cases review the article for Walk-in Case Management.
Setting up Walk-in Locations and Counters
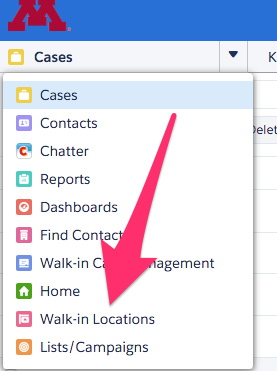
- Use the arrow to bring up the dropdown for the Service Console Navigation Tab and select Walk-in Locations.

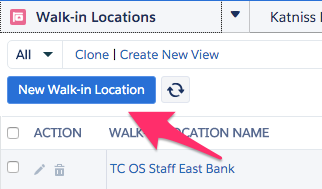
- From the Walk-in Locations Tab click on New Walk-in Location.

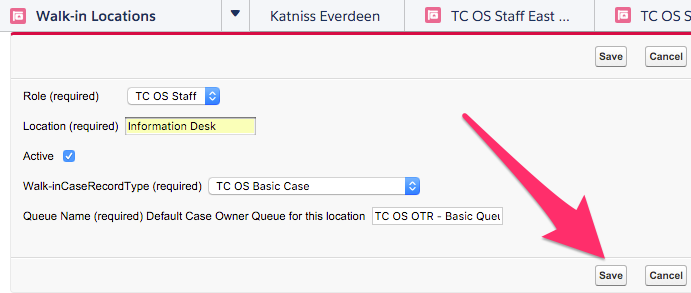
- On the New Walk-in Location screen the fields you fill in with dictate who can see Cases for this Location and where Cases for this location will go.
- Role is a required field that allows you to select what types of Users will have access to this location.
- Location is a required field which allows you to select what you'd like the location to be called.
- Note: The default Name for the Walk-in Location that you are creating will be a combination of the Role + Location.
- The Active checkbox allows you to determine whether or not you want this location to be available to Users to manage.
- The Walk-in CaseRecordType is a required field that allows you to choose the desired Record Type of Cases for this location in the dropdown menu.
- The Queue Name Default Case Owner Queue for this Location is a required field that will assign a default Case Queue for this Location.
- Note: An existing Queue must be selected. If you need a Queue created for this location submit an internal support case.
- Once all of the desired information has been filled in click on Save at the top or bottom of the screen to be brought to the Walk-in Location record.

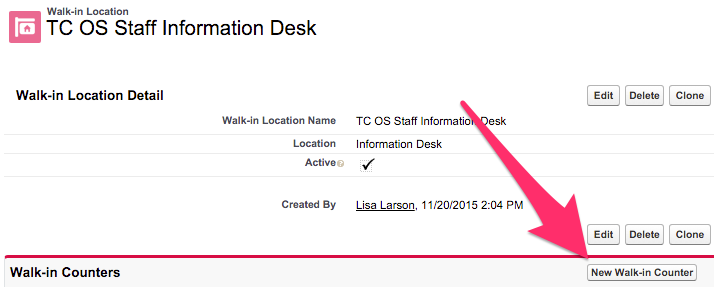
- From the Walk-in Location record to add Counters click on the New Walk-in Counter button underneath the Walk-in Location Detail. This brings up with New Walk-in Counter screen.

- From the New Walk-in Counter screen enter the Walk-in Counter Name for the Counter you're creating and use the Active checkbox to indicate if you'd like the Counter to be active or not at this time.

- If you want to create another Counter click on Save & New to bring up another New Walk-in Counter screen.

- If you are finished adding Counters to the Walk-in Location click on Save to be brought to the Counter record.

