WiFi Printing: Install Driver on a Mac Computer

You can send print jobs via WiFi to printers in UMN Computer Labs but first, you need to install the necessary driver.

  • Once you install the driver, print your documents following the Managed Printing steps.

Installing the Mac OS X driver(s)

  1. Click one of the following links to download the driver for the type of printing you would like to do (Note: The following links will work only if you are accessing this article on a device connected to campus eduroam):
  2. Click on the downloaded file to start the installer. A Finder window opens.
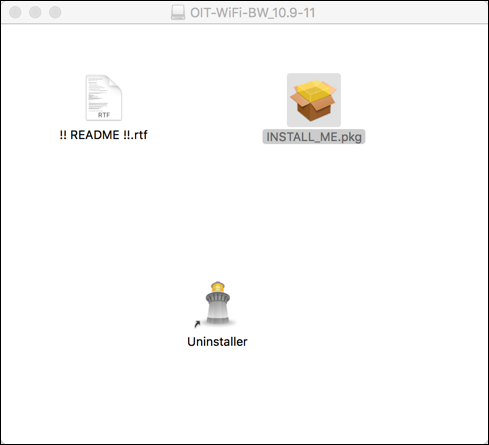
    A Finder window titled OIT-Wireless-BW_10.9-11. It contains three files titled "!! README !!.rtf", "INSTALL_ME.pkg", and "Uninstaller".

  3. Click on INSTALL_ME.pkg. An Install Pharos Popup Client window opens.
  4. Click Continue.

    The Install Pharos Popup Client window. There are a list of steps to the installation. "Introduction" is highlighted. There are two buttons listing "Go Back" and "Continue". Go "Back" is greyed out.

  5. Read the Important Information in the text window.
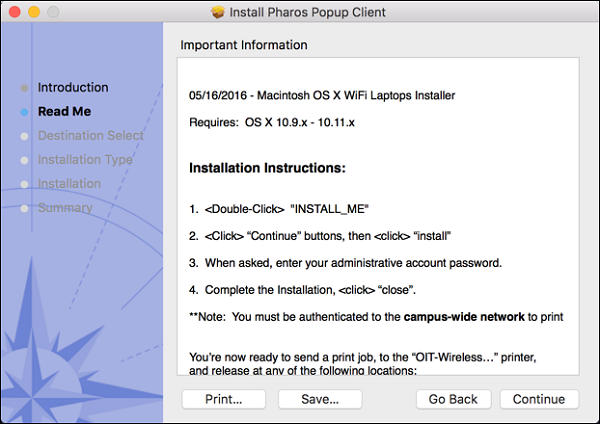
    The Install Pharos Popup Client window. There are a list of steps to the installation. "Read Me" is highlighted. There is a text box titled Important Information. There are four buttons, listing "Print...", "Save...", "Go Back", and "Continue".

  6. Click Continue. The Destination Select screen opens.
  7. Select Macintosh HD or whichever location you would like to install the client.
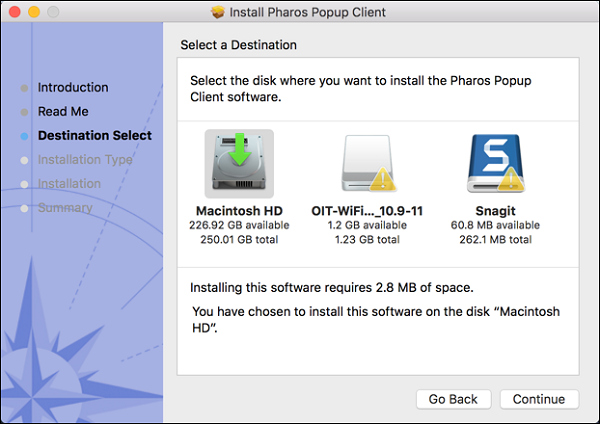
    The Install Pharos Popup Client window. There are a list of steps to the installation. "Destination Select" is highlighted. There are two icons for locations in the window titled "Macintosh HD" and "OIT-Wir...10.9-11" that list available space and total space for each location. There are two buttons, listing "Go Back" and "Continue".

  8. Click Continue. An Installation Type screen opens.
  9. Click Install.
    • If you would like to change the install location from the one you chose at the previous screen, click Change Install Location.
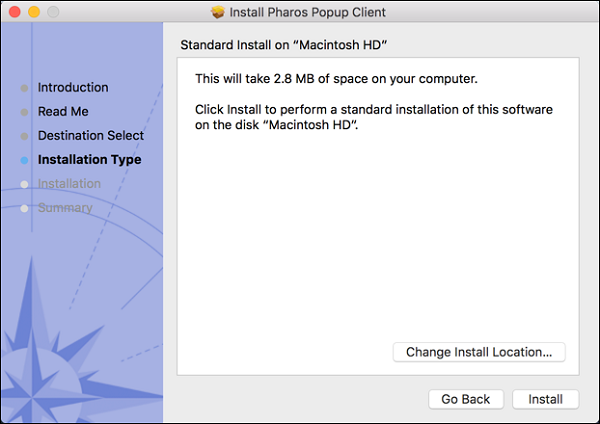
    The Install Pharos Popup Client window. There are a list of steps to the installation. "Installation Type" is highlighted. There is a text box titled Standard Install on "Macintosh HD". There are two buttons, listing "Go Back" and "Install".

  10. Enter the Username and Password for the computer in the window that appears.
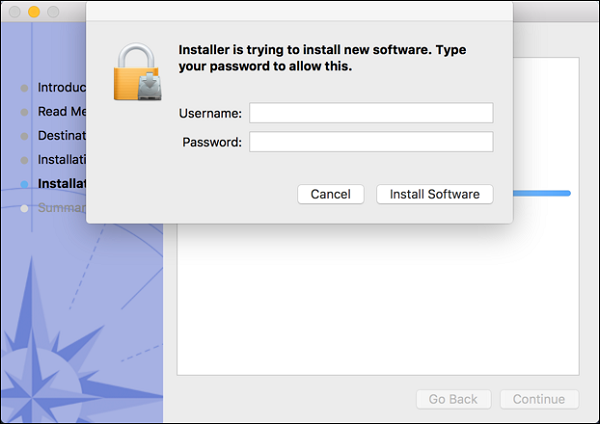
    An administrator access window. The window has two empty text boxes labelled "Username" and "Password". There are two buttons, listing "Cancel" and "Install Software".

  11. Click Install Software. You will receive a message saying "The installation was successful."
  12. Click Close.

Uninstalling the driver

  1. Open Finder.
  2. Click on OIT-WiFi-BW_10.9-11 or OIT-WiFi-Color_10.9-11 under Devices.
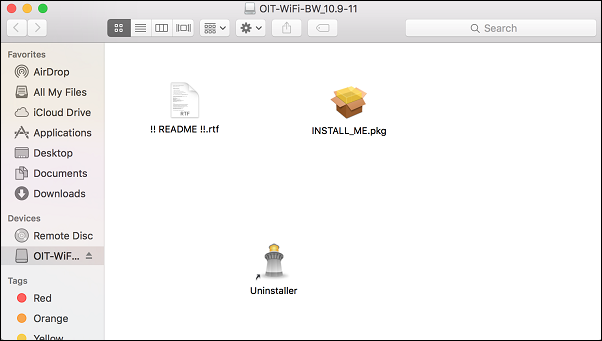
    A Finder window called "OIT-WiFI-Color_10.9-11" containing three icons, called "!! README !!.rtf", "INSTALL_ME.pkg", and "Uninstaller". There is a list of Favorites that includes "AirDrop", "All My Files", "iCloud Drive", "Applications", "Desktop", "Documents", and "Downloads". A list of Devices includes "Remote Disk" and "OIT-WiF...". "OIT-WiF.." is highlighted. A list of tags includes "Red", "Orange" and "Yellow".

  3. Click on Uninstaller.app. A Pharos Uninstaller window will open.
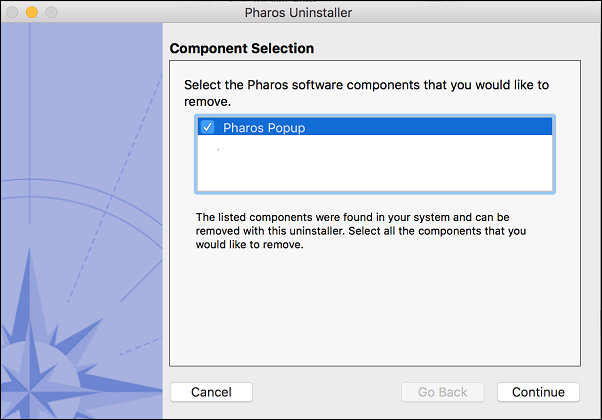
  4. Check the box for Pharos Popup.

    The Pharos Uninstaller window. There is a textbox titled "Component Selection". Within the textbox is a checkbox with one item called "Pharos Popup". The box next to it is checked. There are three buttons in the window listing "Cancel", "Go Back" and "Continue". The "Go Back" button is greyed out.

  5. Click Continue.
  6. Click Continue in the window with Component Summary.
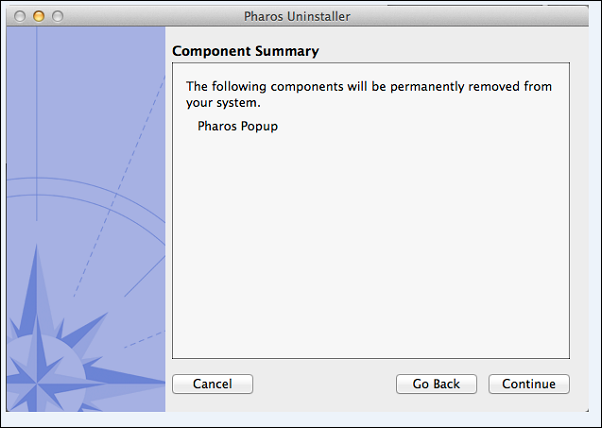
    The Pharos Uninstaller window. There is a textbox titled "Component Summary" and three buttons in the window listing "Cancel", "Go Back" and "Continue". The "Go Back" button is greyed out.

  7. Enter the Username and Password for the computer in the window that appears.

    An administrator access window. The window has two empty text boxes labelled "Name" and "Password". There are two buttons, listing "Cancel" and "OK"

  8. Click Done in the Progress window to complete the uninstallation.
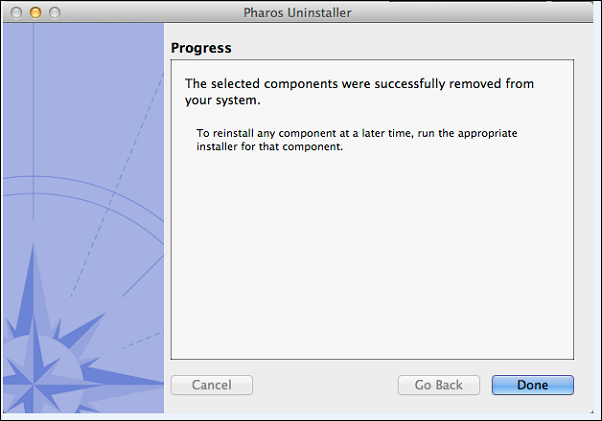
    The Pharos Uninstaller window. There is a textbox titled "Progress" and three buttons in the window listing "Cancel", "Go Back", and "Done". The "Cancel" and "Go Back" buttons are greyed out.

  9. In Finder, C=click on the Eject icon The eject icon for Mac OSX. next to OIT-WiFi-BW_10.9-11 or OIT-WiFi-Color_10.9-11.

Last modified

Changed

TDX ID

TDX ID
3742