
Connecting to eduroam WiFi with Windows on ARM requires additional steps compared to the desktop version of Windows 8.
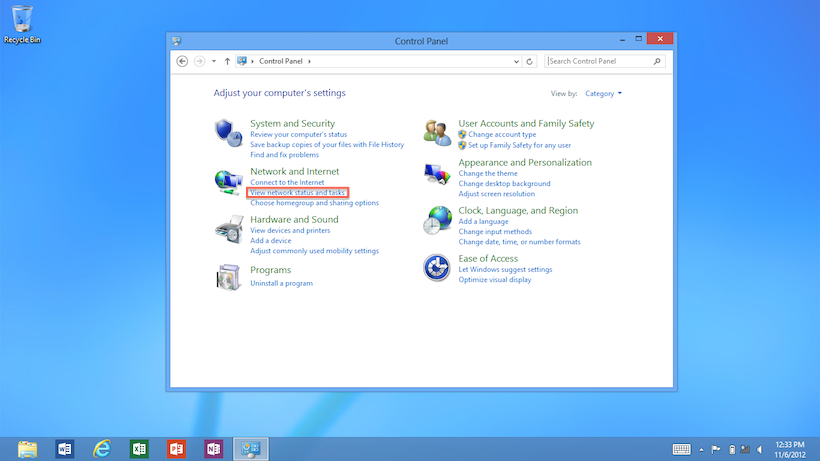
- From the Windows Home (Start) screen, start typing Control. Control Panel will appear on the left side of the screen.
- Once in the Control Panel, select View network status and tasks.
- From the Network and Sharing Center, select the Set up a new connection or network link.
- Select Manually connect to a wireless network.
- Click NEXT.

- Network name: eduroam
- Security Type: WPA2-Enterprise
- Encryption Type: AES
- Click NEXT once these steps are complete.
- On the next screen, select Change connection settings.
- Under the eduroam Wireless dialog, select the SECURITY tab on the top.
- Select Microsoft: Protected EAP (PEAP) for the Choose a network authentication method: drop-down menu.
- Click Settings.
- Under the Protected EAP Properties dialog, uncheck the Verify the server's identity by validating the certificate selection.
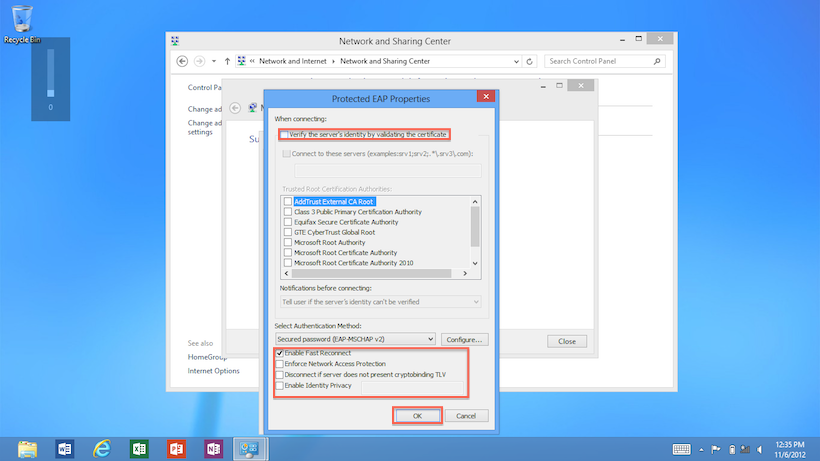
- Click OK to continue.
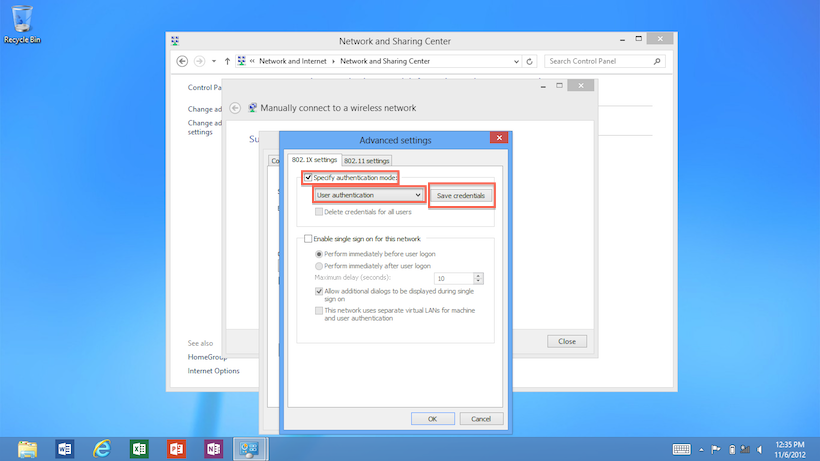
- Return to the eduroam Wireless Network Properties dialog, click the ADVANCED SETTINGS button.
- Check the box labeled Specify authentication mode.
- Select User authentication from the drop down menu.
- Finally, click Save credentials to continue.
- A Windows Security window will appear where you can enter the following information:
- Username: your full University of Minnesota email address
- Password: your University internet ID password
- Click OK to continue.
- Back in the Advanced Settings dialog, click OK to exit the dialog.
- Click OK again to close the eduroam Wireless Network Properties dialog.
- Click CLOSE to exit the final dialog menu.
- Click the Windows Home (Start) button on your Microsoft Surface to return to the Home (Start) menu.
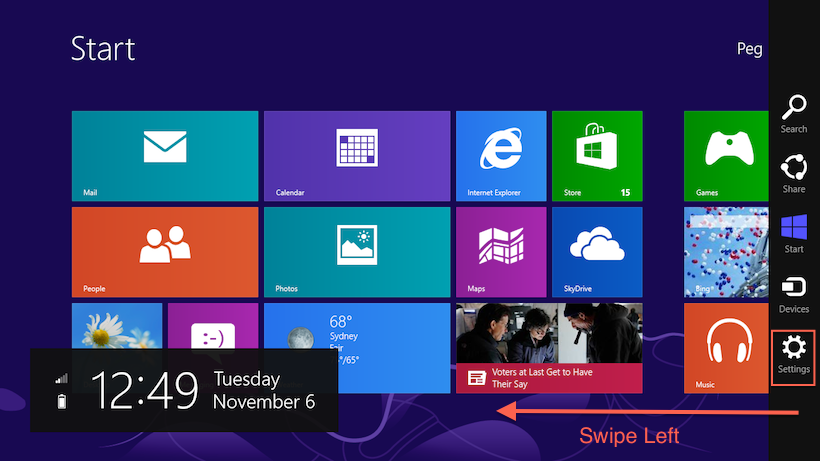
- Swipe from the right side of the screen to the left to open the CHARMS menu pane.
- Click the SETTINGS button from the CHARMS menu (right side of screen).
- Now click the Wireless icon in the expanded CHARMS menu to open the Networks menu. (It may say eduroam, available, or a different network name. Just look for the rising signal bar icon.)
- Click on the eduroam network.
- Check the Connect automatically box.
- Click the Connect button.
Your network should now connect. If it fails, simply turn off your Microsoft Surface and turn it back on. It should automatically connect to eduroam from this point on if it is available. If you continue to have difficulties connecting to eduroam, contact Technology Help.