
Kaltura is a media management platform for teaching, learning, and outreach purposes. This cloud-based system automatically optimizes video files for viewing on any device. Kaltura includes strong accessibility functioning, powerful search features, and deep analytics about who is watching videos and for how long.
You can edit uploaded videos using the Kaltura video editor.
Note: This article assumes that you have already uploaded your video to MediaSpace or Canvas. To upload media, go to:
Editing Your Video Using Kaltura
Watch the video How to use the Kaltura Video Editor (3:30) or follow the steps below:
- Log in to Canvas.
- Select My Media (Kaltura) from the Account menu.

- Choose the edit icon
 , located to the right of the video you wish to edit.
 - Select the Launch Editor button. The video editor opens.
- A timeline of your video displays at the bottom of the editor. The vertical teal line shows where you are in the video and shows three options for editing your content.
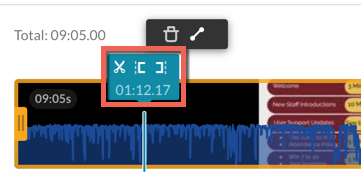
- Set In (represented by an opening bracket icon) allows you to set a start time for your video.
- You can trim unwanted recorded material, such as an audio check at the start of a lecture recording
- Set Out (represented by a closing bracket icon) allows you to set an end time for your video.
- You can trim recording that happens after a presentation, such as an audience leaving
- Split (represented by a scissors icon) allows you to create different video sections to edit and modify.
- Using Split enables the Fade In/Out option
- Splitting content allows you to delete chunks of content within your video
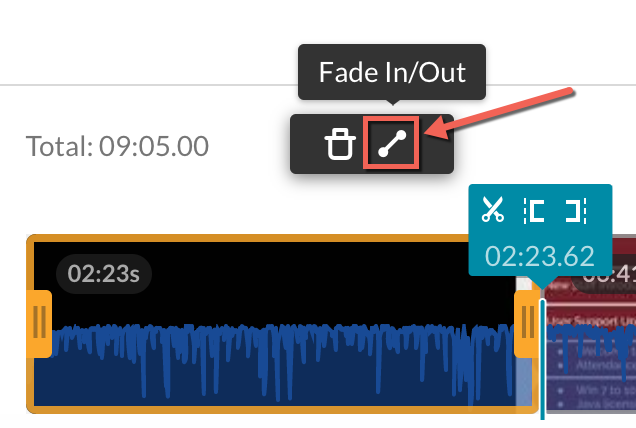
- Above the timeline are the options to Delete or Fade In/Out.
- Delete (represented by a garbage can icon) allows you to:
- Hover over a section
- Select the section
- Delete the section from the video
- Fade In/Out (represented by a line icon with circles on the ends) allows you to set a transition for a clip to fade in or out.
- Hover over a section
- Select the desired amount of seconds you'd like the clip to fade in or out
- Delete (represented by a garbage can icon) allows you to:
- Set In (represented by an opening bracket icon) allows you to set a start time for your video.
- An audio waveform displays in blue, within the video timeline. This lets you visually identify high and low points in the audio. If you need to remove the audio for editing:
- Directly below the video is the Select Audio button. Select it and choose to Hide Audio.

- If at any time you need the audio overlay back, choose Select Audio again and select Show Audio.
- Directly below the video is the Select Audio button. Select it and choose to Hide Audio.
- When you are done editing your video, select the appropriate save option:
- Save a Copy (preferred): Creates a new file with your edited video while also retaining the original video. This option:
- takes less time to save
- automatically trims existing captions
- results in a new clip, which means the previous video you shared with viewers will stay the same
- Save: Selecting this option in the upper right saves the newly edited video, overwriting the original.
- Save a Copy (preferred): Creates a new file with your edited video while also retaining the original video. This option: