What Are Bios?
Bios records are powerful tools that allow you to assign information about a contact or organization to the Contact or Organization record within Enterprise CRM. There are various Bios record types to accommodate assignment of different types of information, with more fields available than a Tag or Note.
In addition to providing information to users within CRM they can be a tool for making associations between records that can be shown through reporting.
You may want to review Bios record types prior to beginning this process if you are unsure which type of Bio you want to create.
What Are My Privacy Options?
Enterprise CRM has records that it shares across all business units and organizations. The Bios record type is one of those records and is considered public.
This means that any information you put into a Bios record and associate with a Contact or Organization will show on those records for any other user of Enterprise CRM, regardless of business unit.
Creating a Bio record
- Navigate to the parent record (i.e. Contact, Organization) that you would like to add the Bio to.
- If adding a Bio to more than one record you are able to do this starting from the Bio Tab.
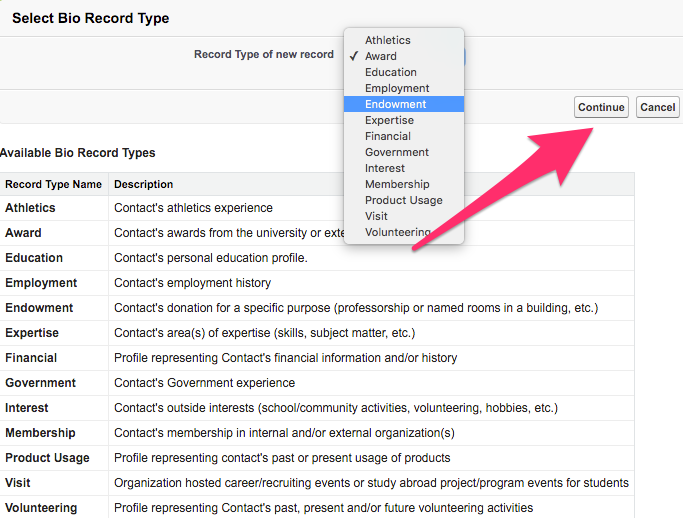
- From Bios Home click New or from another record type look for the Bios section and click the New Bios button. This brings up the Select Bio Record Type page.
- From the dropdown on the Select Bio Record Type screen choose the desired Bio Record Type and click Continue.

- This brings up the New Bio screen where information is able to be filled in as needed. This will largely be determined by internal business practices.
- If you have all of the information filled in and you would like to create another Bio click Save & New to be brought back to Step 2.

- If you have all of the information filled in and you are done adding Bios click Save to be brought to the Bio record.

