The recommended app to install and use to help you work with Box files from your desktop is Box Drive.
Install Box Drive
There are known issues with having both Box Sync and Box Drive installed on your machine. This is not a supported configuration. Please follow this guide to uninstall Box Sync before installing Box Drive.
If you currently have Box Sync installed, uninstall Box Sync before installing Box Drive.
Mac
Prerequisites:
- macOS 10.11 or higher
- macOS 10.13 is supported with Box Drive v1.2.93+
- HFS or HFS+ formatted hard drive
- APFS formatted hard drives are supported with Box Drive v1.2.93+
- Box Sync is not installed
Recommended minimum system specifications:
- 1.6GHz dual core processor
- 4GB of RAM
Note: If your machine does not meet the recommended system specifications, you may still be able to install and run Box Drive. However, you may encounter a degraded experience.
Installing Box Drive on macOS on a University-owned device
- Follow the instructions for installing software using the Self Service Application
Installing Box Drive on macOS on a personal device
- Download the Box Drive installer.
- Navigate to the location where you saved the file, then, double-click it to run the Installer
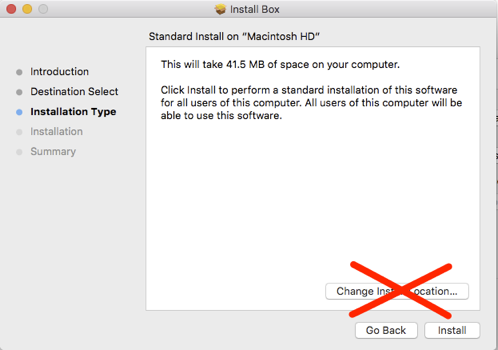
- When prompted, select Install for all users of this computer and click Continue
- DO NOT change the install location. Click Install.

- Once the installation has completed, you will see an installation completed successfully window. Click Close to close the installer.
- Box Drive will launch after the installation completes. Please note the additional steps for macOS 10.13 users below.
- You will need to log in to Box Drive the first time you open it. You may be redirected to your company's log in page.
- After logging in, you will be shown a quick walkthrough of Box Drive features. Once this is complete, your Box content is available at ~/Box.
Log Into Box Drive for the First Time
Note: If you have macOS 10.13 High Sierra you will need to follow the instructions below prior to logging in with this step.
After install, you'll need to sign-in with your Box account when prompted. You may be redirected to your company's log in page.
After logging in, Box Drive will open a new Finder window automatically, and Box should appear under both Favorites and Devices in the Finder side bar.
Additional steps for macOS 10.13 High Sierra:
Due to security requirements introduced in macOS 10.13, some additional steps are needed for users installing Box Drive on macOS 10.13.
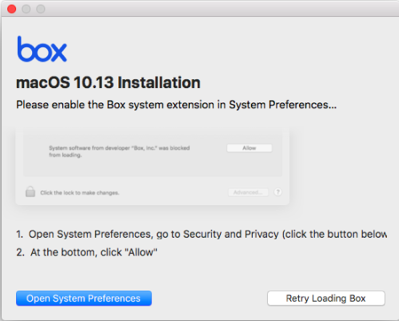
After Box Drive is installed and before the login window appears, you will see the following prompt:

Please follow the steps and click Open System Preferences. Then click Allow near the bottom of the Security & Privacy window.
After clicking Allow, go back to the previous prompt and click Retry Loading Box.
Note: you cannot click Allow while remotely accessing the machine.
Windows
Prerequisites:
- Windows 7 (32-bit or 64-bit) or Windows 10 (32-bit or 64-bit)
- Universal CRT
- .NET version 4.5.2 or higher
- Box Sync is not installed
Recommended minimum system specifications:
- 1.6GHz dual core processor
- 4GB of RAM
Note: If your machine does not meet the recommended system specifications listed above, you may still be able to install and run Box Drive. However, you may encounter a degraded experience.
Installing Box Drive on Windows on a University-owned device
- Follow the instructions for installing software with Software Center
Installing Box Drive on Windows on a personal device
- Download the Box Drive installer.
- Navigate to the location where you downloaded the file, and double-click it to run the installer.
- Follow the instructions to complete the installation. If Box Drive does not launch automatically upon installation, you may need to launch the application from the Start menu.
- You will need to log in to Box Drive the first time you open it. You may be redirected to your company's log in page.
- After logging in, you will be shown a quick walkthrough of Box Drive features. Once this is complete, your Box content is available at C:\Users\USERNAME\Box.
Log Into Box Drive for the First Time
Box Drive will run automatically once installed. You can also open it from the Start menu.
Simply sign-in to Box when prompted to start using Box Drive. You may be redirected to your company's log in page. After launching Box Drive for the first time, you'll be able to access Box from the File Explorer or the Windows system tray.
Logging out / Changing which account you're logged in with
This is not supported in the Public Beta version of Box Drive. To change which account you're logged into Box Drive with, perform a complete uninstall and reinstall.
