
Creating a course in Training Hub is a simple process of first entering the course and then adding the sections to the course. In this article we will cover the first part of that process.
View a short 6-minute video to see an overview of creating a new course.
Only Training Admins can create and edit courses. To request the Training Admin role, please fill out the Training Hub Access Request Form.
Creating a New Course
- Log in to the Training Hub.
- Click the Admin Console button.
- In the Training Administration Resources section, click Manage Courses.
- Click the Add Course button.
- Fill out the first part of the form, including:
- Course Title can contain up to 255 characters (numbers, letters, punctuation)
- Course Number can contain 6 characters (numbers and letters only)
- Administered By is the organizational unit whose admins can manage this course. When clicked, this field will display (one or more values to choose from).
- Short Description can contain up to 500 characters
- Click Save and Continue. A confirmation that the course has been successfully created is displayed at the top of the page.

The second part of the form is displayed. The previous elements are still available. The Course Number can not be edited, but the other elements (Course Title, Administered By, Short Description) can. The Course Deep Link, which is the URL of the course page as it appears to learners, is displayed. Scroll down to continue filling out the form.
- Click Add/Edit Long Description. A modal window is displayed with multiple tabs for entering text.
- You can enter and format the long description content in the text editor on any of the tabs. The title of the tab (Program Overview, Learning Outcomes, Topics, Who Should Attend, CE Credits) will be the heading when displayed on the course page
- When finished, click Save and Continue. The modal window is closed.
- If the course has prerequisites, click the Add Prerequisites button. The Create Prerequisites page is displayed.
- From the drop-down list of Training Hub courses, select the prerequisite course.
- The prerequisite list will display all active courses that are administered by your group.
- Choose the requirement:
- Selecting Enrollment means the learner must be enrolled in (or have completed) the prerequisite.
- Selecting Completion means the learner must have completed the prerequisite.
- Click Create Prerequisite. You are returned to the Edit Course page and the prerequisites table displays the course title, requirement, edit button, and remove button.
- From the drop-down list of Training Hub courses, select the prerequisite course.
- The Sections table contains one default section. You can interact with the course sections using the tools in this table.
- For general information about Sections, see the Understand Sections article.
- The article Create a New Section will guide you through the steps.
- Select a Course Status. By default, the course status will be Draft. Learners will not be able to view the course page. For more information on Course Status and course life cycle, refer to the "manage course life cycle" section of the self-help guide.
- If you set the course status to Active, there is an option to have the course displayed in the Training Hub Catalog.
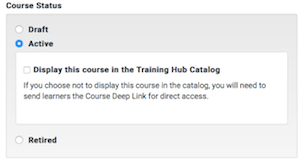
- If you set the course status to Active, there is an option to have the course displayed in the Training Hub Catalog.
- Click Save.