
This is the eighth of nine tasks for setting up your Jadu Central forms to work with Jadu Connect. Please go to the Self-Help Guide, under the Configure a Jadu Connect Workflow column, for more information.
The following steps assume successful testing of the initial case creation in Task 3: Verify the Case Creation. This testing builds upon the previous testing, picking up where the prior steps left off.
This article allows you to make sure:
- The Next Form URL opens the correct form
- The Jadu Connect fields on the landing page are correct
- The Jadu Connect Case Number populates
- The Access Code Verified field is Yes
- Data pulls into your next form as expected
- Data populates in the Jadu Connect case correctly and no data unintentionally clears from Jadu Connect.
- Jadu Connect Case transitions successfully for all workflow paths
Note: This is not a comprehensive list of testing steps for your Jadu Central form(s). Your forms may need additional testing.
Verifying the Email URL and Prefilled Fields
- From your email inbox, open the email sent from Jadu Central
- Click on the URL and make sure the correct Jadu Central form opens.
- If you set up the form to require a sign-in, sign in using your U of M login information.
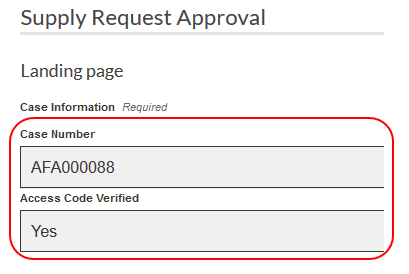
- On the landing page, make sure:
- The Case Number field contains the correct case number
- The Access Code Verified field contains the value Yes
- Click Next
- Make sure any Jadu Connect data set to prefill from your first form into your subsequent form populates.
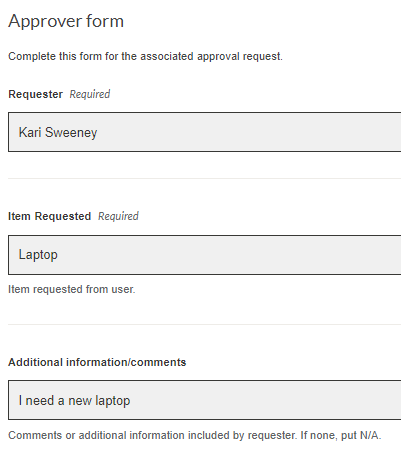
- Complete the remaining form fields.
- Click Submit.
Verifying the Jadu Central Submission Logs
- Log into the Jadu Central Form Building Environment
- Go to the Received tab in your Jadu Central form
- Click the link under Reference to open the most recent submission
- Click on the Log tab to check for success status in the Jadu Connect Type section

- If the status is error, click on the View details link in the Actions column to see more information
Verifying Case Data Updates Correctly in Jadu Connect
- Log into the Jadu Connect Workflow Building Environment
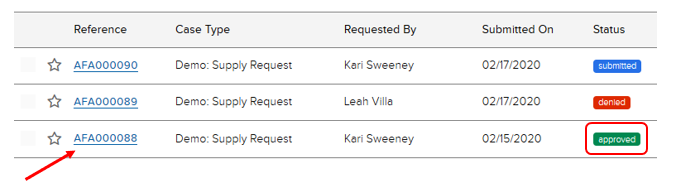
- Find the Reference number that matches the reference number listed in the Jadu Central log
- Make sure the status matches your desired status after the case transition.
- Make sure the status matches your desired status after the case transition.
- Click the case Reference link for the submission you wish to view
- Click the Details tab to see the current values for the Jadu Connect fields. Make sure:
- the correct data is in each field
- all fields expected to have data are correctly populated
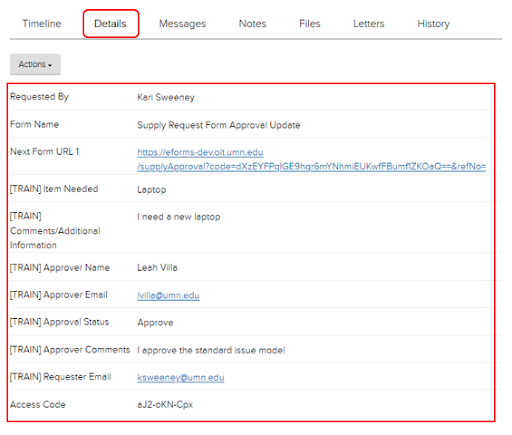
- If a field is on your Jadu Connect form but not listed, then no data sent from Jadu Central for that field.
- Click the Details tab to see the current values for the Jadu Connect fields. Make sure: