
When a form is submitted and sent to the next participant in the workflow process, it must include a URL to the participant to access the next form. This URL is specific to the initial form submission and ties the case data to the form.
This is the second of nine tasks to setting up your Jadu Central forms to work with Jadu Connect. Please go to the Self-Help Guide, under the Configure a Jadu Connect Workflow column, for more information.
Note: The following steps are completed in Jadu Central within the initial or first form in your workflow process.
In this article:
- Step 1: Generating an Access Code Using Logic
- Step 2: Creating the URL for the Next Form
- Step 3: Adding the URL to an Email Template
- Step 4: Creating or Updating a Rule to Send an Email with the Next Form URL link
- Next Task in Setting up your Jadu Central Forms to Work with Jadu Connect
- Additional Resources
Generating an Access Code Using Logic
Creating an Access Code logic assigns a unique code to your form for security purposes. Access codes are used across all next forms to check for validation in Jadu Connect.
- From your "first form" in Jadu Central, go to the Logic tab.
- Click Add Logic.
- Name: Enter a meaningful name (ex: Access Code)
- Type: Select Predefined. The Formula options appear.
- Formula: Choose Generate Access Code from the dropdown.
- Click Save.
Creating the URL for the next form
- Click Add Logic.
- Name: Enter a meaningful name (ex: Approval Form URL)
- Type: Select Predefined
- Formula: Select UMN - Utility - Next Form URL from the dropdown. The Inputs section appears.
- Inputs:
- Next Form: Select the next form in your workflow process.
- Note: If your form does not appear in this list, it may be because a friendly URL doesn't exist or the form is not Live. Use the Jadu Connect Setup Request form to request a friendly URL from OIT
- Access Code: Select the logic created in Generating an Access Code Using Logic.
- Next Form: Select the next form in your workflow process.
- Click Save.
Note: After creating the URL and Email logic, add them to your Create Jadu Connect Case Template from Task 1. The Jadu Connect fields to map the logic to are located at the bottom of the Create Case template in the Mappings section. Adding these fields to the Create Case Template allows Jadu Connect to store the URL and access code data used to access subsequent forms.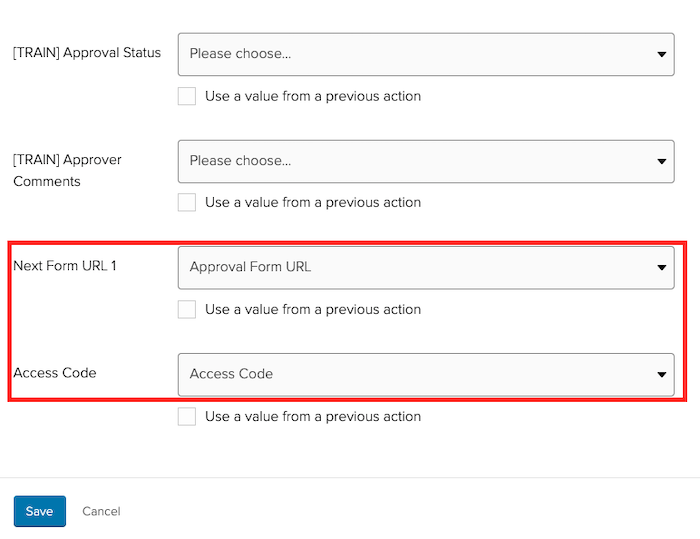
Adding the URL to an Email Template
- Go to the Templates tab.
- Click Create Template.The Create Action Template window appears.
- Choose Send Email for the template type and click Next
- Fill out the Title, To, From, and Subject per your requirements.
- Note: It's recommended to include the Jadu Connect Case Reference number placeholder in the Subject line to create unique emails. This prevents Google mail from stacking the emails into a single thread.
- In the Content section, add the following placeholders directly next to each other to construct the full URL:
- Place your cursor where you want to insert the URL in your email body
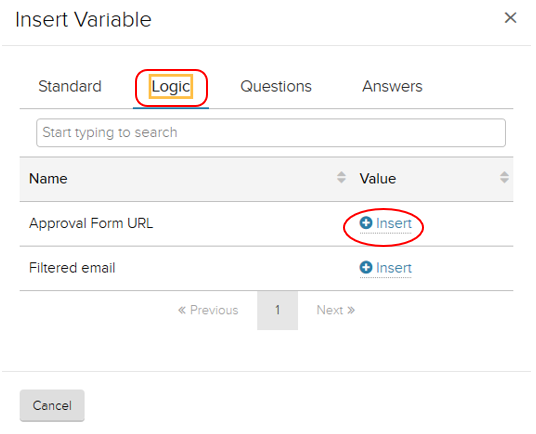
- Click Insert Placeholder.
- Click the Logic tab.
- Select Insert to the right of the logic that you just created using the Next Form URL formula. The placeholder inserts in the body of the email.
- Select Insert to the right of the logic that you just created using the Next Form URL formula. The placeholder inserts in the body of the email.
- Leave your cursor at the end of the recently inserted Approval Form URL placeholder.
- Click Insert Placeholder.
- Click the Standard tab
- Select Form - Connect Case Reference

- Make sure the two placeholders are directly next to each other, with no space between them:

- Click Save.
Creating or Updating a Rule to Send an Email with the Next Form URL link
Create a new rule or update an existing rule to create the Jadu Connect case. If you have more than one rule in your form that runs based on different conditions, update the appropriate rule(s) that you want to trigger an email containing the URL link.
- Go to the Rules tab.
- Click Create Rule.
- Or, select the rule you wish to update.
- Enter a meaningful title for your rule.
- Choose a When statement.
- Add a Then statement.
- From the dropdown menu, under the Email header, choose the action Send Email
- Select the Email template you created in Adding the URL to an Email Template section above.

Important: The Create Case action must run before sending the email containing the Next Form URL.
- Click Save.
Next Task in Setting up your Jadu Central Forms to Work with Jadu Connect
Task 3: Verify the Case Creation