
Set up a University-Branded Email using Qualtrics
Qualtrics Mass Email Requirements
Email sent from Qualtrics must follow the University's mass email requirements based on the audience receiving the email. Use these instructions to set up a University-branded email within Qualtrics.
Access the shared U of M template and use it to set up a branded Survey Invitation email
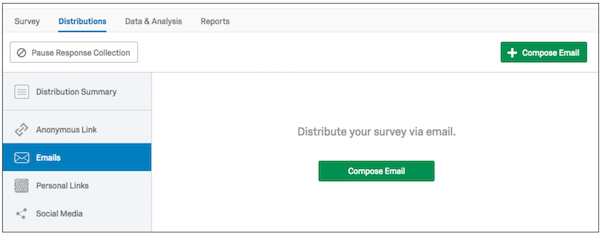
- Log into Qualtrics, open your survey, and navigate to the Distributions module.
- Open the Emails section and click Compose Email.
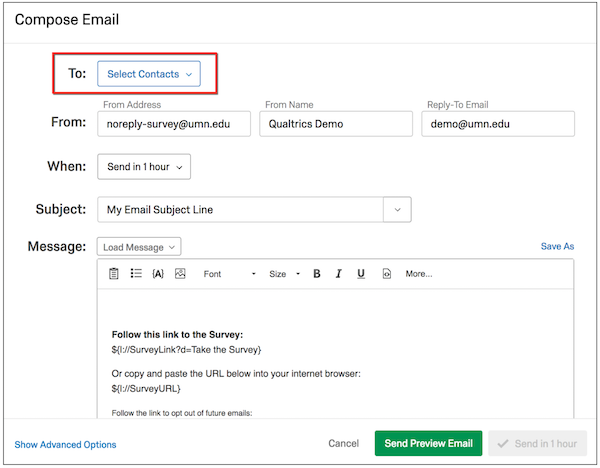
- Within the Compose Email screen, click Select Contacts. Choose the library where your contacts are located, and select the appropriate contact list or create a new contact list. Enter a subject for your email. OPTIONAL: you can change the default 'From Address' to any email address that ends with @umn.edu, and enter an appropriate 'From Name.'
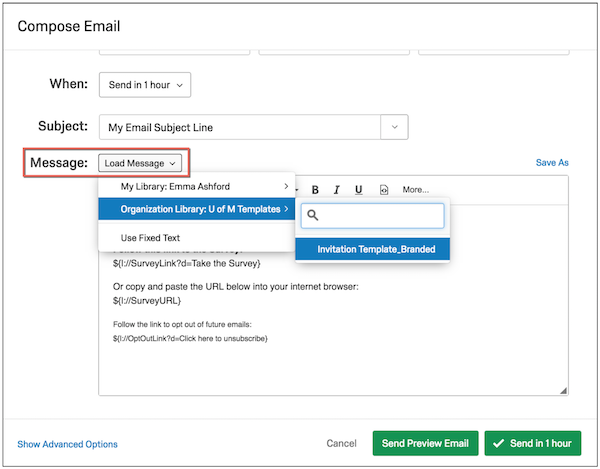
- Click on Load Message and select the library Organization Library: U of M Templates and then Invitation Template_Branded. The email template will appear in the message content area.
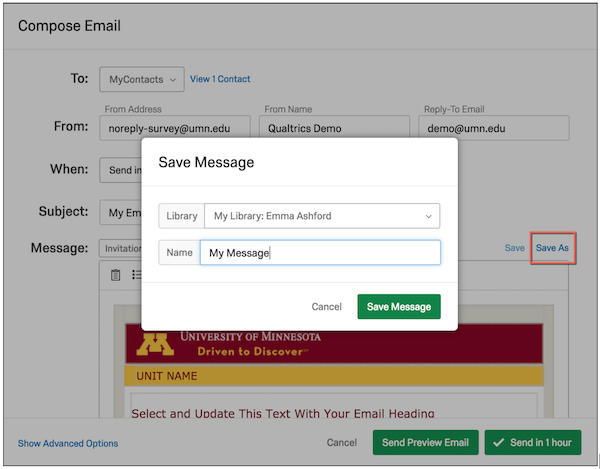
- Click the Save As link (above the message content area), select a library where your message will be saved, enter a message name, and click Save Message.
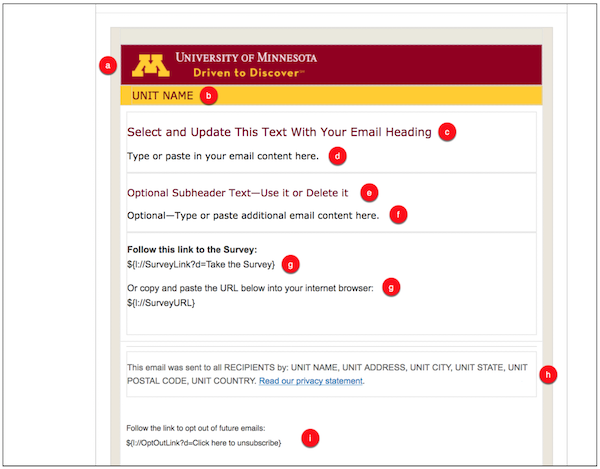
- Enter your own content into the message area, which includes the University's branded email template with the following placeholder content:
- Required/Not EditableA standard University of Minnesota graphic header that meets brand requirements
- Optional/EditableA section for a unit, project, or other pertinent name/heading
- Optional/EditableA maroon text heading
- Optional/EditableA text area for your content
- Optional/EditableAn optional secondary maroon subheading
- Optional/EditableOptional text
- Required/EditableAutomated survey links
- Required/EditableFooter text
- RequiredUnsubscribe text
-
When you have finished editing the message content, click on one of the options to either send a preview email or distribute the email to your contact list. For more information, see Email Survey Invitations.