
This is the ninth of nine tasks for setting up your XFP forms to work with CXM. Please go to the Self-Help Guide, under the Configure a CXM Workflow column, for more information.
All CXM cases must reach a final status at the end of the process. Leave no cases open indefinitely. A case may have multiple final statuses.
For example:
- Complete indicates successful completion of a request
- Cancelled indicates an incomplete request
Both statuses are final because there are no further actions to take on the case.
Note: The following steps are completed in XFP within the final form of your workflow process.
In this article:
- Step 1: Setting Up an Action Template to Transition the CXM Case
- Step 2: Creating or Updating a Rule to Transition the CXM Case
Setting Up an Action Template to Transition the CXM Case
- Go to the Templates tab.
- Click Create Template.The Create Action Template window appears.
- Template type: Under the Jadu CXM section, select Transition Case and click Next
- Enter a meaningful title for the template (ex: Transition CXM Case - Complete) and click Next
- From the Case Type dropdown, select your case type that this form is associated to and click Next
- Select the CXM transition from the case type you want to apply and click Next

- Case Reference: In the dropdown, select Case Number field from the integrated component on your landing page.
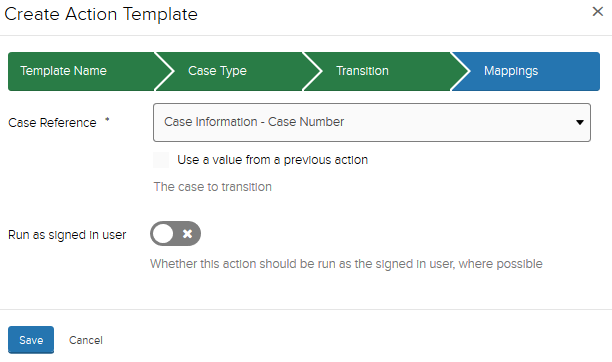
- Click Save.
Creating or Updating a Rule to Transition the CXM Case
Create a new rule or update an existing rule to edit the CXM case. If you have more than one rule in your form that runs based on different conditions, update the rule(s) in the correct order for transitioning the CXM case to a final status.
- Go to the Rules tab.
- Click Create Rule.
- Or, select the rule you wish to update.
- Enter a meaningful title for your rule.
- Choose a When statement.
- Add a Then statement.
- From the dropdown menu, under the Jadu CXM header, select Transition Case
- Select the template from Setting Up an Action Template to Transition the CXM Case.
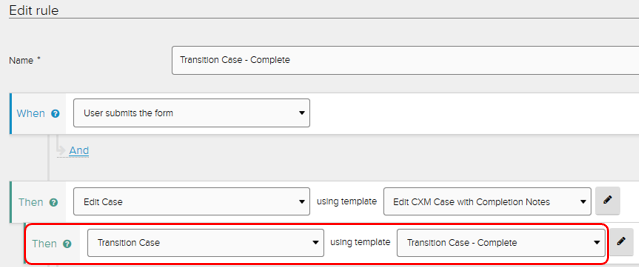
- Click Save.