When, why, and how to create a Case is largely determined by internal business processes. Depending on the setup of your campus' CRM and the different queues setup for staff management, you may or may not need to manually enter Cases. If you do, it is a good idea to check with internal business processes on the criteria to choose within the Case to ensure appropriate routing.
This article explains the process for manually creating a Case from a Prospect record, outside of any other data loading streams
Creating a Case from a Prospect Record
If Needed Navigate to the Prospect Record
- From your homepage, click on Prospects if showing as a default tab or click on the All Tabs button (+) in the menu bar to display All Tabs and clicking on Prospects in the list.
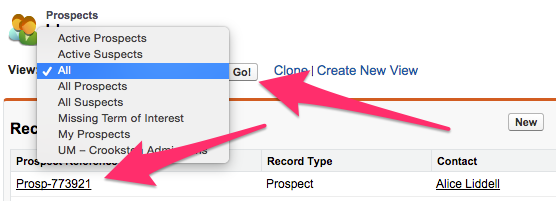
- On the Prospects Home Tab find the Prospect record that needs the Case added either by clicking on the Prospect Reference from your default view or by searching the appropriate dropdown selection in the View: menu and clicking Go!

- Once the Prospect you want to update shows in the list click on the Prospect Reference to open the Prospect record.
Create a Case from the Prospect record
- Once on the Prospect record there are two ways to create a New Case:
- At the top of the Prospect record hovering the text Cases brings up a window where the New Case button is able ot be clicked.

- Underneath the Prospect Detail section of the Prospect record a section titled Cases is available where the button for New Case is able to be clicked.

- At the top of the Prospect record hovering the text Cases brings up a window where the New Case button is able ot be clicked.
- From either location clicking on New Case brings you to the Select Case Record Type screen where you will want to select the record type of Admissions and click Continue.
- This brings you to the New Case screen.
- Check with your internal business processes for what fields to fill out and how to ensure the Case gets into the correct queue and that all of the necessary information has been provided for the staff member who will manage the Case.
- Once all required and desired fields have been filled, clicking Save at the top or bottom of the New Case screen will save your changes and bring you to the Case screen, where additional actions such as sending an email can be completed as needed.

