
This is the third of nine tasks to setting up your XFP forms to work with CXM. Please go to the Self-Help Guide, under the Configure a CXM Workflow column, for more information.
After completing tasks 1 and 2, test the form for the following functionality before moving on to the Update CXM Case section in the Self-Help Guide:
- Successful CXM case creation
- Data populates correctly in the CXM case
- The URL to the next form generates correctly
Note: This is not a comprehensive list of testing steps for your XFP form(s). Your forms may need additional testing.
In this article:
- Testing the XFP Form Submission
- Checking the Case Creation in CXM
- Verifying an Email Sends with a Complete URL to the Next Form
- Next Task in Setting up your XFP Forms to Work with CXM
Testing the XFP Form Submission
Testing your XFP form submission for all possible paths ensures that your form functions the way that you expect, to create cases in CXM.
- Log into the XFP Form Building Environment.
- Access the live version of your "first form" in XFP.
- You can access the form from the Publish tab within the form page
- Or, you can click View Live from the main forms page
- Fill out and submit your XFP form.
- Make sure to fill out all fields so you can make sure they map correctly to the CXM fields
- If you have page branching or conditional sections, make sure to complete a form for each possible scenario to test all fields
- Go to the Received tab in your XFP form
- Click link under Reference to open the most recent submission.
- Click on the Log tab to check for:
- success status in the Jadu CXM Type section
- Case reference number in the Info section
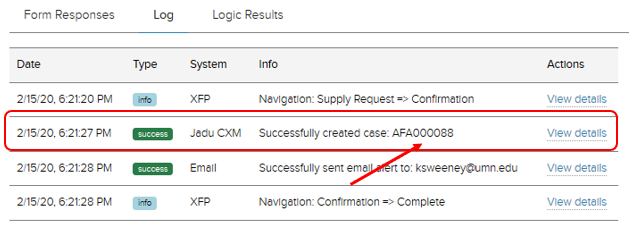
- If the status is error, click on the View details link in the Actions section to see more information.
Checking the Case Creation in CXM
- Log into the CXM Workflow Building Environment
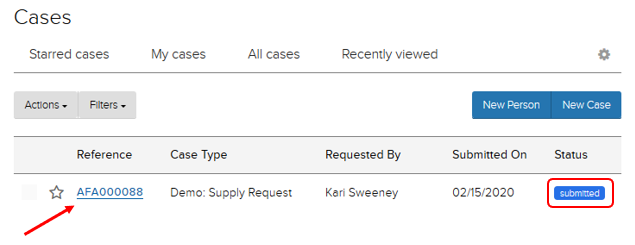
- Find the Reference number that matches the reference number listed in the XFP log
- Make sure the status matches your desired status after a case is created.
- Make sure the status matches your desired status after a case is created.
- Click the case Reference link for the submission you wish to view.
- Click the History tab
- Under Event, make sure the text says Case Created

- Click on View details to see the data sent from XFP when the case was created. Make sure:
- the correct data is in each field
- all fields expected to have data are correctly populated
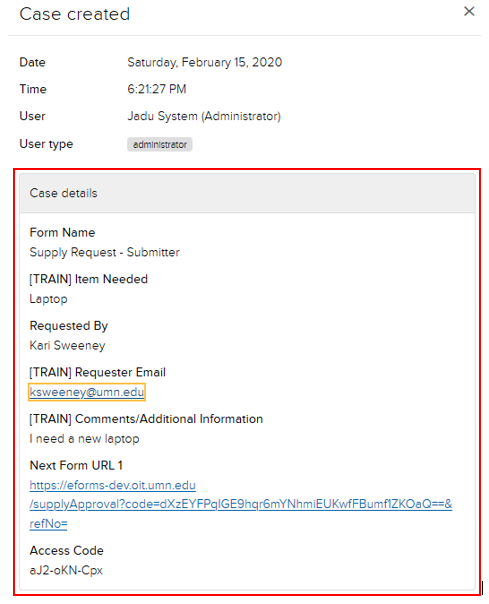
- If a field is on your CXM form but not listed, then no data sent from XFP for that field.
Verifying an Email Sends with a Complete URL to the Next Form
- From your inbox, open the email sent from XFP.
- Make sure:
- The CXM Case Number successfully populated in the email subject
- The URL in the email is a complete link that includes the same case number at the end.
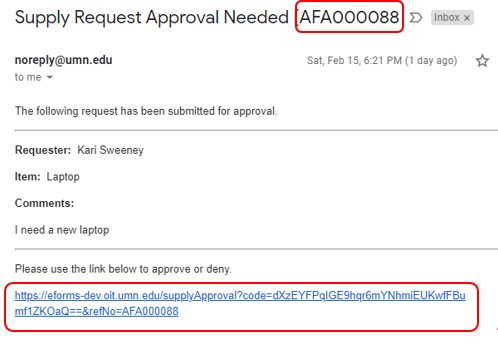
- Note: The URL can be fully tested after completing the tasks in the Update CXM Case section.
Next Task in Setting up your XFP Forms to Work with CXM
Task 4: Connect XFP Form to CXM case