Cases usually come in with some kind of logic to them. They may come from a particular web form, email address, or meet certain dropdown criteria. Sometimes, however, a Case in your queue may not be categorized correctly or perhaps need follow up from a specific individual or group. At that time you will want to transfer the Case to the correct individual or group.
Here because you've had a Case assigned to you and/or your queue and not seeing the fields you need? Look at Instructions to Update the Case to the Correct record type.
Need to change the Owner of multiple Cases from one queue to another? Look at instructions on how to Change Owners as a Mass Action.
Instructions
- Navigate to the Case you'd like to transfer, if needed.
- Once on the Case record look for the Case Owner field under Case Information and click on [Change] next to the current Case Owner. This brings up the Select New Owner screen.
![[Change] next to the Case Owner field [Change] next to the Case Owner field](https://it-knowledge.umn.edu/sites/it-knowledge.umn.edu/files/tdxassets/%255BChange%255D%2520button%2520for%2520Case%2520Owner.jpg)
- Note: Not seeing [Change]? You're probably on the Case Edit screen. Click on the Cancel button at the top or bottom of the screen to be brought back to the Case record.
- On the Select New Owner screen use the dropdown menu next to Owner to select the appropriate type of Owner (User or Queue) that you'd like to transfer the Case to.

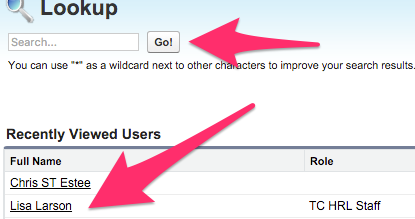
- Once the appropriate Owner type is selected click on the Lookup icon to get a list of potential Users or Queues.

- The Search box can be used to look for Users or Queues not showing in your default Lookup list. Click on the User or Queue you'd like to transfer the Case to and it will populate on the Select New Owner screen.

- If assigning to a User and/or Queue outside of your business unit and they do not know they are getting the Case selecting the Send Notification Email checkbox will alert the User/Queue.

- Once all selections are showing the correct information click on Save to finalize the changes and, if the Send Notification Email checkbox is selected, send any required emails.

