
As an instructor or course designer, you will sometimes want to view and test a course site from the student's perspective. You may want to know:
- Is content visible?
- Is there content that should be hidden from view?
- Does the student experience of content organization and sequencing make sense?
- Are the activities correctly configured?
There are 2 ways you can simulate the student experience:
- View a course using the built-in Canvas Student View function. View a course as a test student using Student View describes what you can and cannot do using this built-in Canvas feature.
- View a course using the UofM Test Student role to simulate the student perspective completely.
The focus of this article is on enrolling a guest account to use as a test student. It covers:
- Benefits of using the UofM Test Student role
- Creating a Guest Account
- Enrolling a Test Student
- Editing a Test Student's Section Enrollment
- Removing a Test Student
- Using the Test Student role
Benefits of using the UofM Test Student role
Unlike the Canvas Student View user, the UofM Test Student role can:
- Be assigned to groups
- Click-through from Canvas into external tools such as VoiceThread or publisher content packages such as eTextbooks.
- Participate in Collaborations
- Do peer reviews
- Have a different due and availability dates for an assignment
- Have a profile
If you already have a guest account, go to Enrolling a Test Student. If you don't, you will need to create one.
Creating a Guest Account
- Go to Request Guest Account
- Fill out the form fields.
- Email Address: Enter an active email address; it cannot be a University email address.
- Click Submit. An email message about your Guest Account is sent to the email address you specified in the form.
- Your full email address will be used as your University Internet ID.
- Your password is the one you set when you filled out the request form.
Note: In most situations, a new guest account will be pulled into Canvas within an hour. Occasionally, a guest account will not be pulled into Canvas in a timely manner. If you have tried enrolling your guest account unsuccessfully after waiting for at least an hour, please contact Technology Help for further assistance.
Enrolling a Test Student
You can enroll a user as a Test Student using Course Admin Tools.
- Go to the Course navigation menu and select Course Admin Tools. The Manage Enrollments window appears.
- If you do not see Course Admin Tools, follow the steps in How do I manage Course Navigation links? to enable that feature.
- Click the Enroll button. The Add Enrollment window opens.
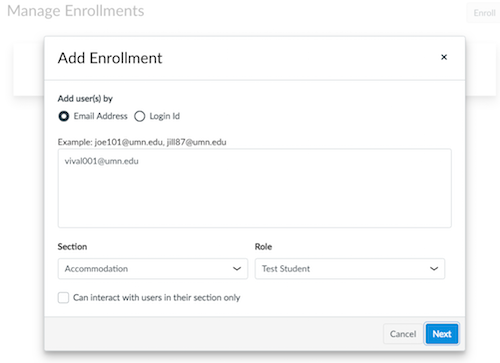
- Enter the email address of the account you want to enroll in the Add user(s) by text entry box. The Role drop-down menu should say Test Student.
- Optional: Choose a Section to limit a user's access to just that section.
- Click Next. A confirmation window appears.
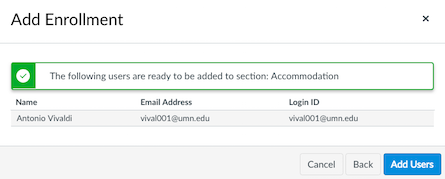
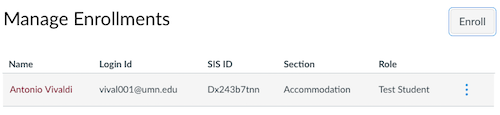
- Click Add Users. The user is added to the course as a Test Student.
Editing a Test Student's Section Enrollment
You can change a user's Test Student enrollment.
- Go to the Course menu and select People. The Manage Enrollments window appears.
- Click the Options icon (the 3 vertical dots on the right) for the user.
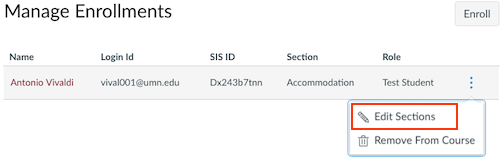
- Click Edit Sections to add or remove the user from additional sections. The Section Enrollments window appears.
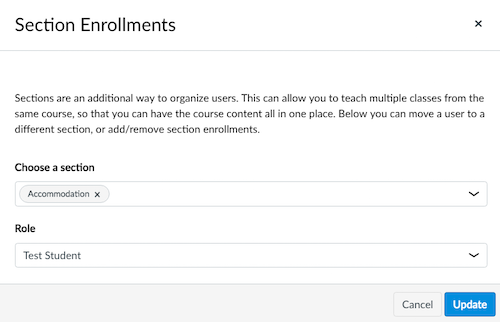
- Choose a section from the drop-down menu.
- Click Update.
Removing a Test Student from a Course
You can remove a Test Student user from a course.
- Go to the Course menu and select People. The Manage Enrollments window appears.
- Click the Options icon (the 3 vertical dots on the right) for the user. The Add Enrollment window appears.
- Click Remove to unenroll this Test Student user from the course.

Using the Test Student role
- Log into canvas.umn.edu using your guest account.
- Accept the course invitation.
- View and test your site.